How to Connect Office to Multiple AWS VPCs with AWS Peering
This document describes a common use case where a customer needs to connect her on-prem office to a group of VPCs securely so that developers can connect to the instances in VPC and work on applications.
In this case, the customer does not want to build an IPSEC tunnel to each VPC, nor does she want to build a full blown Global Transit Network.

Fortunately since traffic is always initiated from the on-prem office as there are no servers in the office, there is a simple solution to connect many VPCs with one single IPSEC tunnel by leveraging the Aviatrix Site2Cloud feature and AWS Peering.
Below are the steps to configure.
Planning and Prerequisites
If you have not launched an Aviatrix Controller, start with the Aviatrix startup guide
If this is your first time using Aviatrix, make sure you go through the Aviatrix Controller on-boarding process.
1. Launch a gateway in the transit VPC
Go to the Gateway page to launch a gateway in the transit VPC that servers to move traffic between a Spoke VPC and on-prem network. The gateway must be launched on a public subnet where its associated route table has a route 0.0.0.0/0 that points to AWS IGW.
Important
Make sure you enable NAT when launch the gateway in the transit vpc.
Setting |
Value |
|---|---|
Cloud Type |
AWS |
Gateway Name |
simple-transit-gw |
Account Name |
OpsTeam |
Region |
us-west-2 |
VPC ID |
transit VPC ID |
Public Subnet |
The public subnet where the transit GW instance is deployed |
Gateway Size |
|
Specify a Reachable DNS Servier IP Address |
Leave it unselected |
Enable NAT |
check |
Add/Edit Tags |
Additional AWS Tags for the Transit GW instance |
Below is a screenshot of the setup. Note that NAT is enabled.

2. Setup a Site2Cloud tunnel to on-prem office
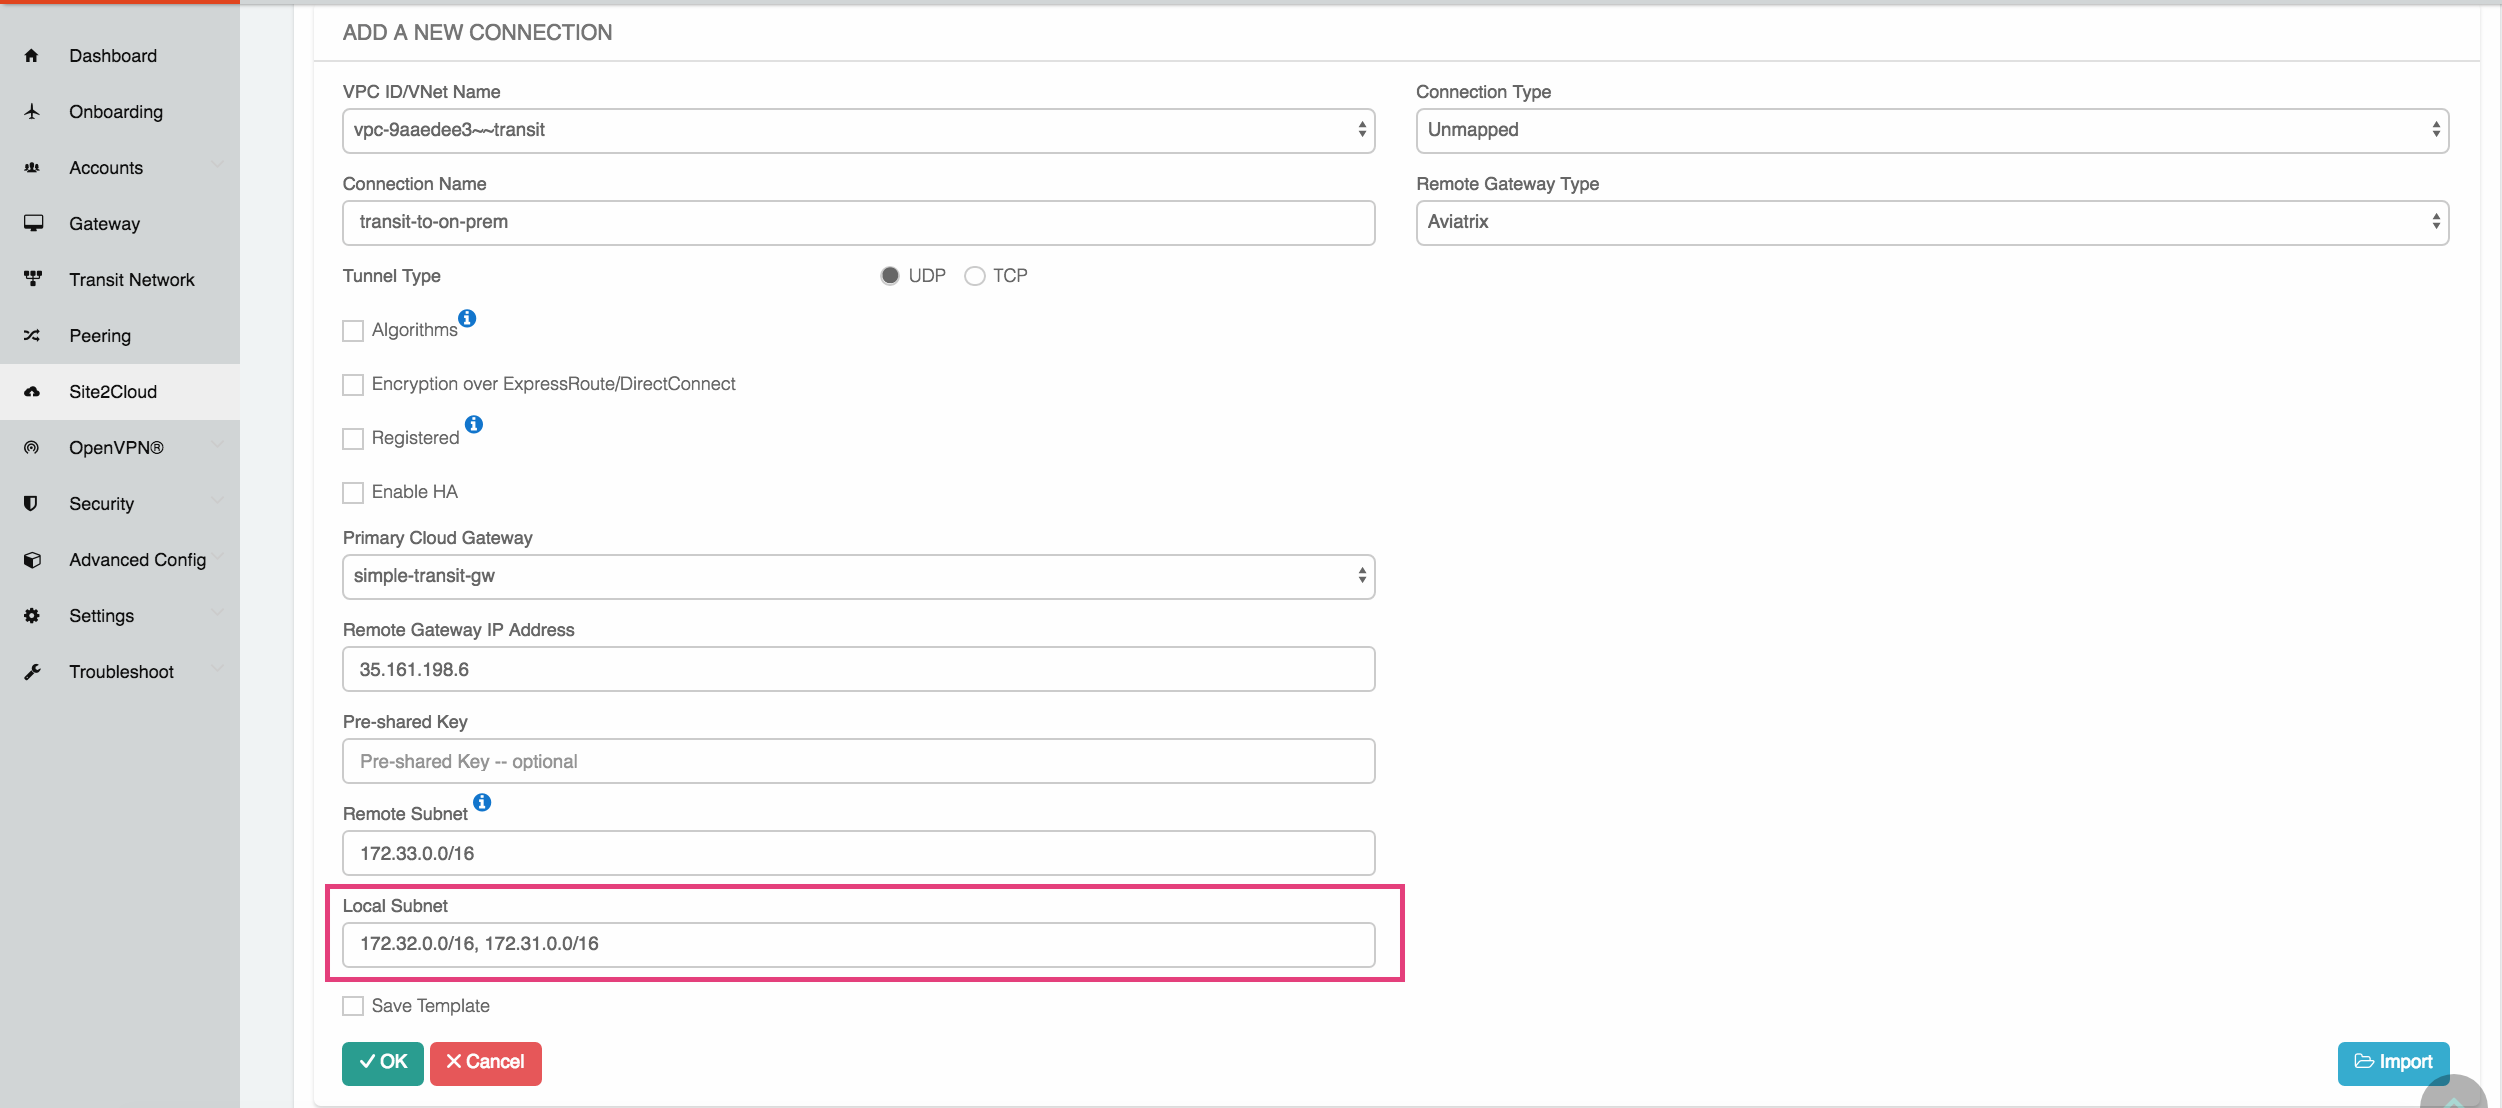
After the gateway is launched successfully, go to Site2Cloud to create a new IPSEC tunnel between the transit VPC and on-prem office.
Setting |
Value |
|---|---|
VPC ID/VNet Name |
transit vpc in the drop down |
Connection Type |
Unmapped |
Connection Name |
a unique name to identify the connection |
Remote Gateway Type |
select one type from a drop down |
Tunnel Type |
select UDP |
Algorithm |
leave it unchecked |
Encryption over ExpressRoute/DX |
leave it unchecked |
Enable HA |
leave it unchecked |
Primary Cloud Gateway |
select the transit gateway launched in step 1 |
Remote Gateway IP Address |
the public IP address of the on-prem firewall device |
Pre-shared Key |
leave it unchecked |
Remote Subnet |
the on-prem office CIDR list separated by comma |
Local Subnet |
all spoke VPC CIDR list separated by comma |
Save Template |
leave it unchecked |
Below is a screenshot of the setup. Note that the local subnet is a list of all Spoke VPC CIDRs.
3. Download the Configuration Template
After the above Site2Cloud connection is created, select the connection. Select a Vendor Generic if the on-prem firewall device is not Aviatrix nor Cisco. Click Download Configuration.
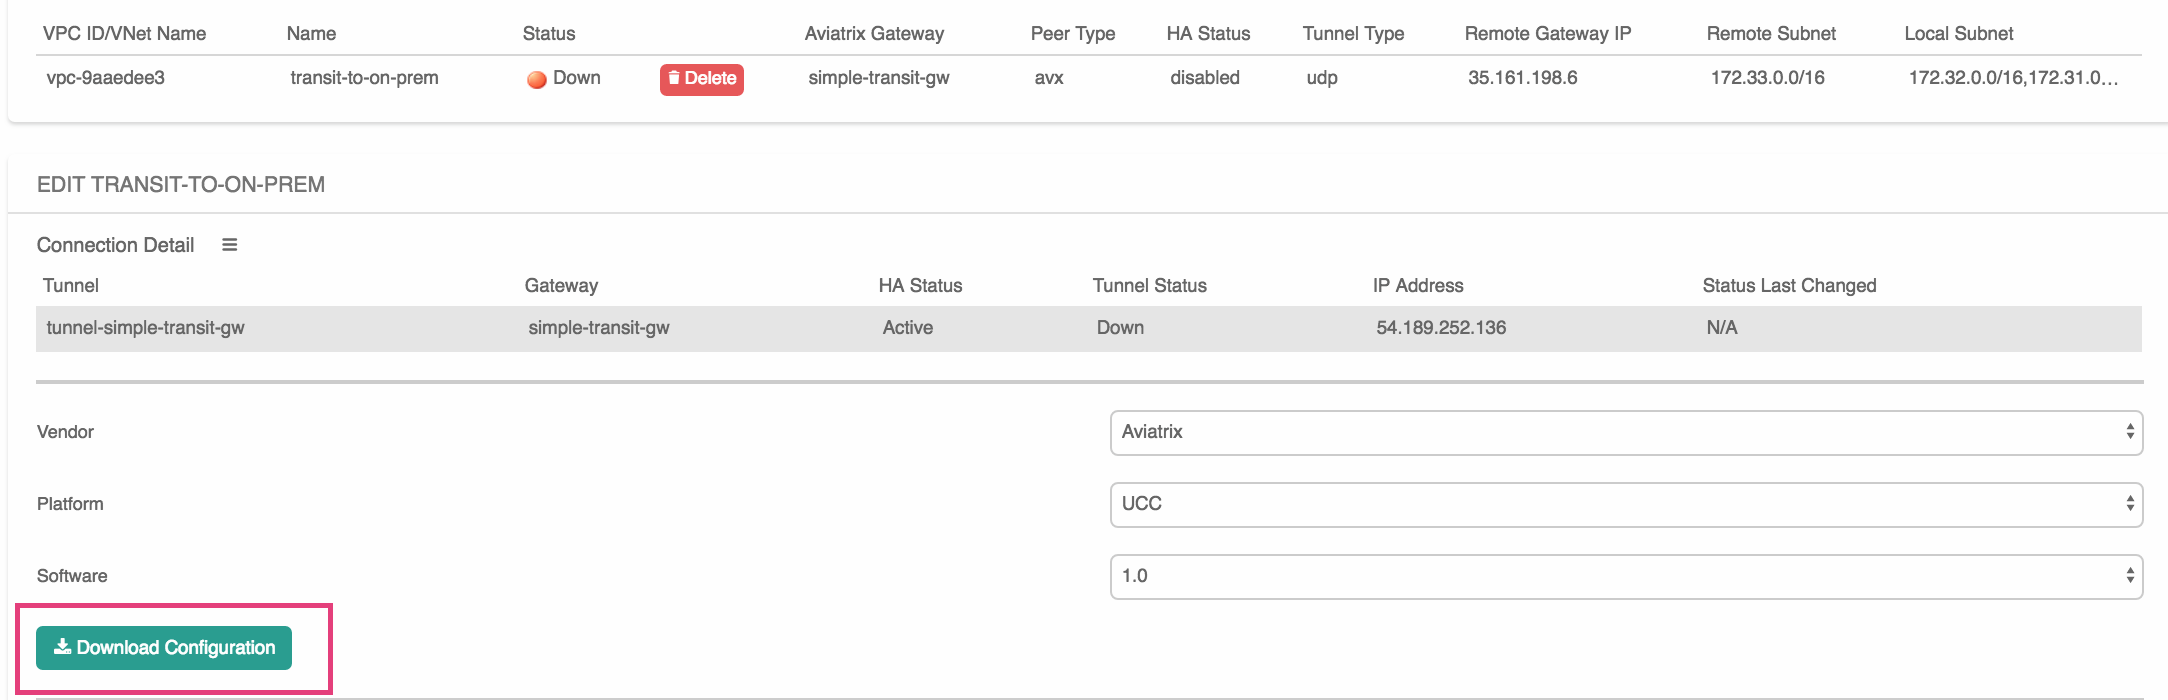
After you download the IPSEC configuration template, use the template to configure your on-prem device.
4. Connect Spoke to Transit
Once the site2cloud tunnel is up, it’s time to use AWS Peering to build connectivity between a Spoke VPC and the transit VPC.
Go to Peering -> AWS Peering, click New Peering. Select a spoke VPC and the transit VPC, and click OK.
The AWS Peering will be established and the routing tables will be programmed by the Controller.

5. Congratulations!
Now you can test connectivity by initiating a “Ping” or “SSH” from office host machine or your laptop to an EC2 instance in a Spoke VPC.
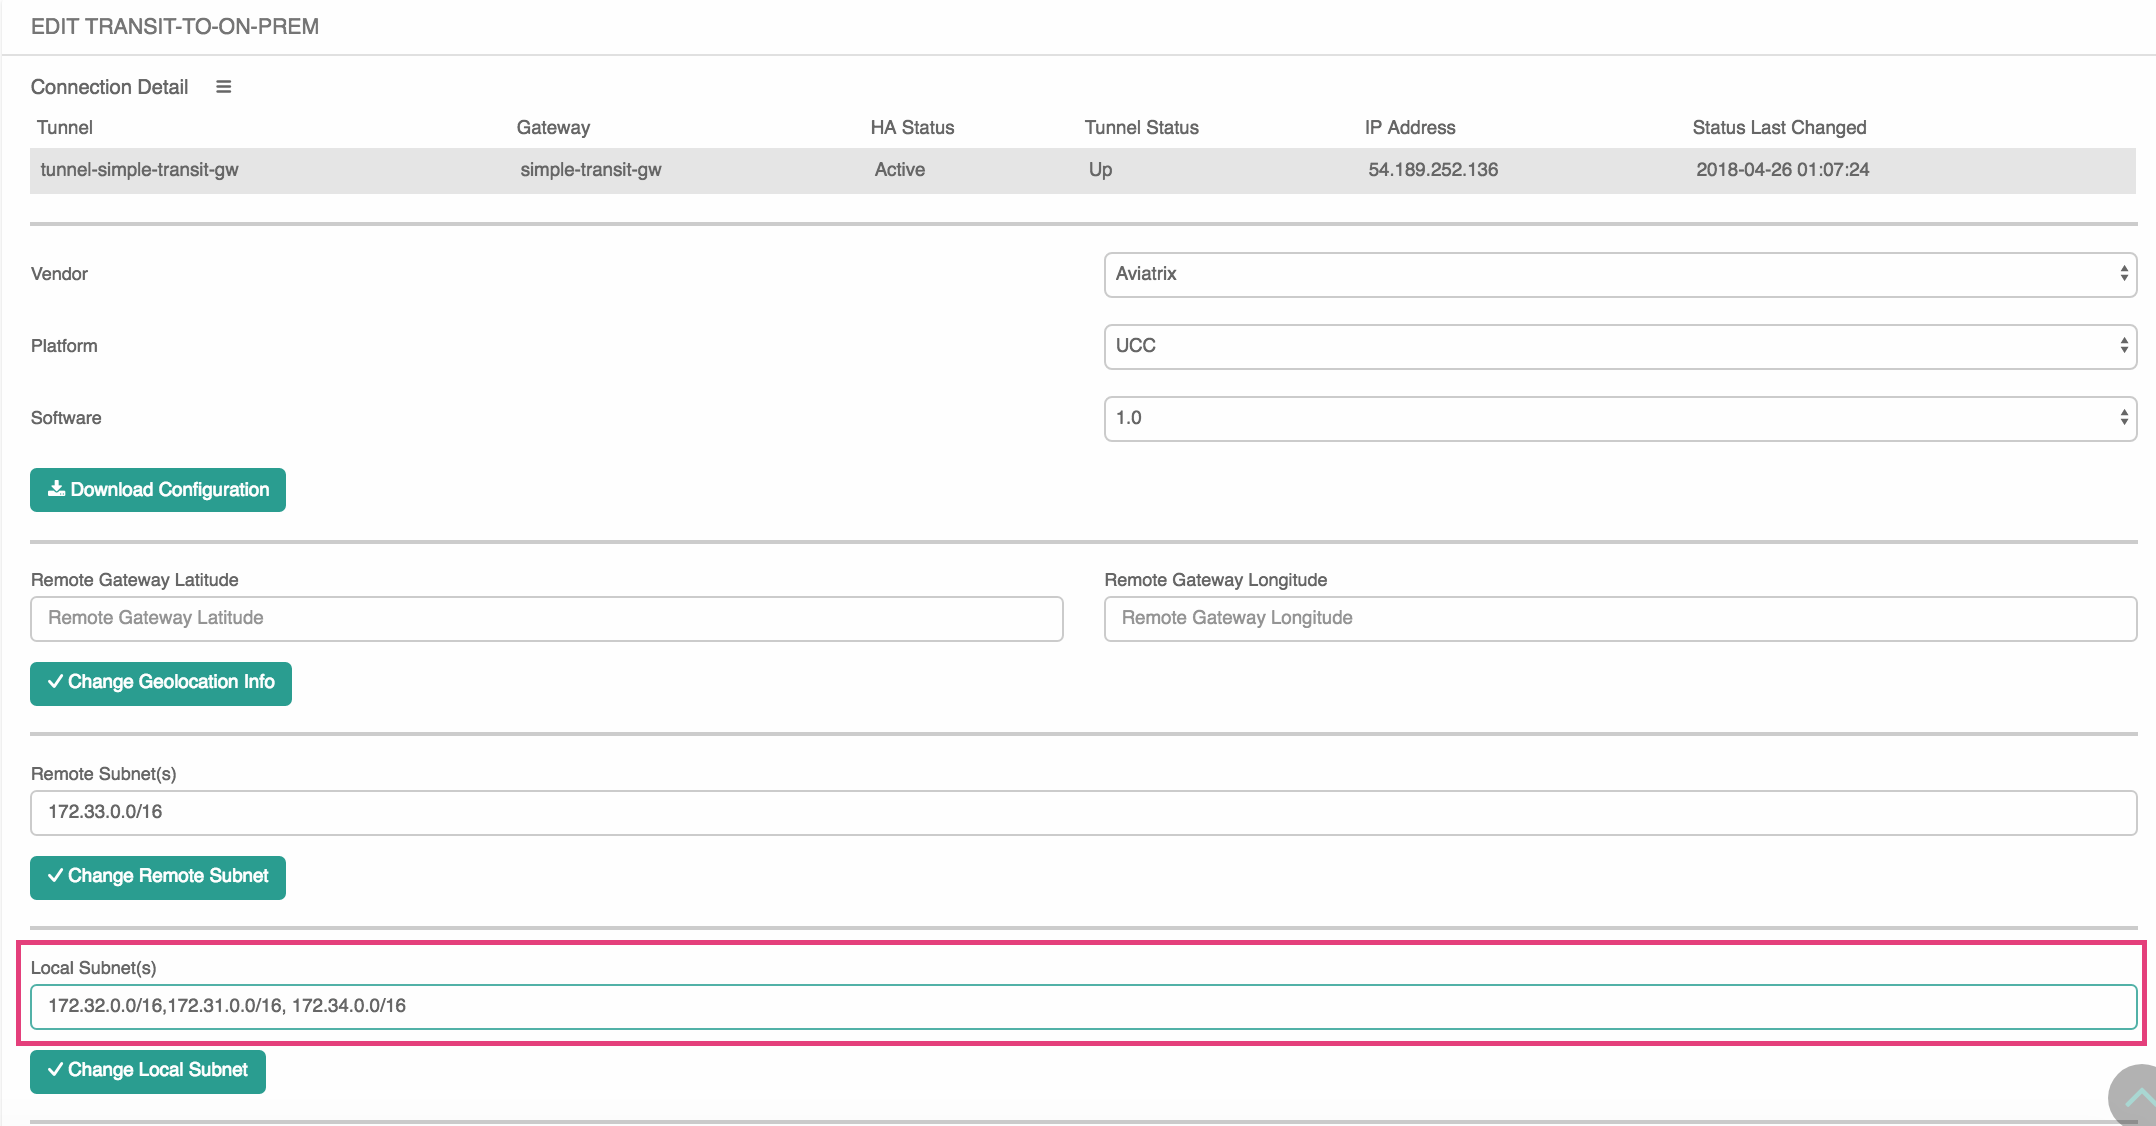
6. Add More Spoke VPCs
Each time you add a new Spoke VPC, you need to edit the site2cloud tunnel to include the new Spoke VPC CIDR in the remote CIDR field, as shown below. Similarly, you may need to edit your on-prem device to include the new Spoke VPC.