Gather Information for Azure Onboarding
You must collect several IDs and a client secret associated with the Aviatrix PaaS application registered in Azure. This information is needed to establish a connection between Aviatrix PaaS and your Azure account.
When you register an application, a service principal is created for the associated tenant. The service principal serves as the identity that the Aviatrix PaaS application uses to securely access your Azure resources.
You need to collect the following information associated with the application you register for Aviatrix PaaS in Azure. You enter the information in the Aviatrix PaaS console when onboarding your cloud account.
-
Subscription ID
-
Application ID
-
Directory ID
-
Client Secret
You can register a new application in Azure or use an existing one.
-
If you are creating a new application/service principal in Azure, follow the instructions in:
-
If you have an existing application in Azure that you want to connect with, follow the instructions in:
Required Permissions
Aviatrix PaaS onboarding of an Azure account requires the following permissions to perform the associated tasks:
-
Application Administrator, Cloud Application Administrator, or Global Administrator role
Required to register an application to create a service principal.
-
User Access Administrator or Owner role at subscription level
Required to assign the Contributor role at the subscription level.
-
Application Administrator, Cloud Application Administrator, or Global Administrator role
Required to generate a client secret.
Create a Service Principal in Azure
To onboard an Azure account, you must create a service principal that provides an identity for Aviatrix PaaS within the Microsoft Entra ID tenant. This identity allows Aviatrix PaaS automated and secure access to your Azure resources.
The service principal is created when you register an application in Azure. You must then assign a role and create a secret identifier for the application. As you perform the following tasks in the Azure Portal, you will gather the required onboarding information to enter in Aviatrix console.
-
Register an application to create a service principal
Collect the Application (client) ID and Directory (tenant) ID
-
Assign a role to the application
Collect the Subscription ID and assign the Contributor role.
-
Create a secret identifier for the application
Create the secret and collect the Client Secret Value.
Register Your Aviatrix Application
Register a new application in Azure. This action creates the service principal to be used for Aviatrix PaaS.
-
In the Azure portal, go to App registrations.
-
Click + New registration and enter a clear and memorable name for your Aviatrix application (service principal).
-
Select Accounts in this organizational directory only, and then click Register.
The page displays details of your Aviatrix application registration.
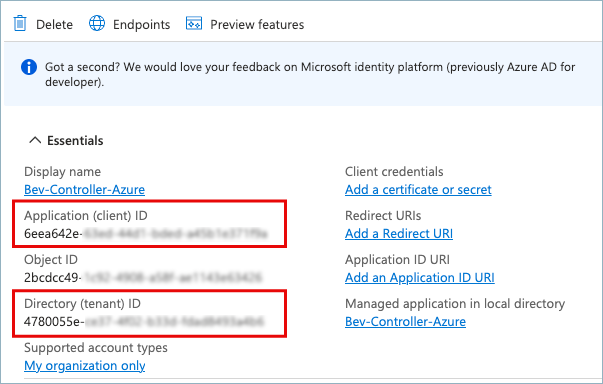
-
Copy the Application (client) ID and Directory (tenant) ID of the new application into a text file and save the file.
You will use these ID values later to onboard your Azure account in Aviatrix PaaS.
Assign a Role to the Aviatrix Application
After registering the application to be used as the Aviatrix PaaS service principal, assign this application a role to set up the connection between your Azure account and your Aviatrix PaaS account.
-
In the Azure portal, search for and select "Subscriptions."
-
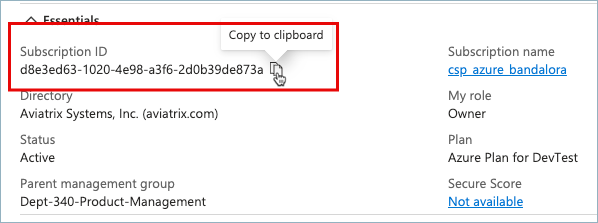
Identify the subscription you want to use and click the Subscription Name to open more details.
-
Copy the Subscription ID to the text file where you saved the Application ID and Directory ID.
-
Select Access control (IAM) in the left navigation.
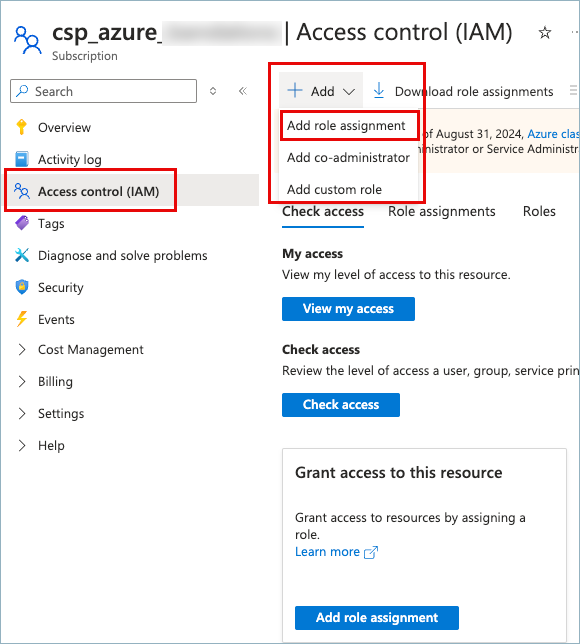
-
On the Access control (IAM) page, click + Add > Add role assignment.
Alternatively, you can click Add role assignment, under Grant access to this resource.
-
On the Role tab, select Privileged administrator roles.
-
In the table, search for and select the Contributor role.
-
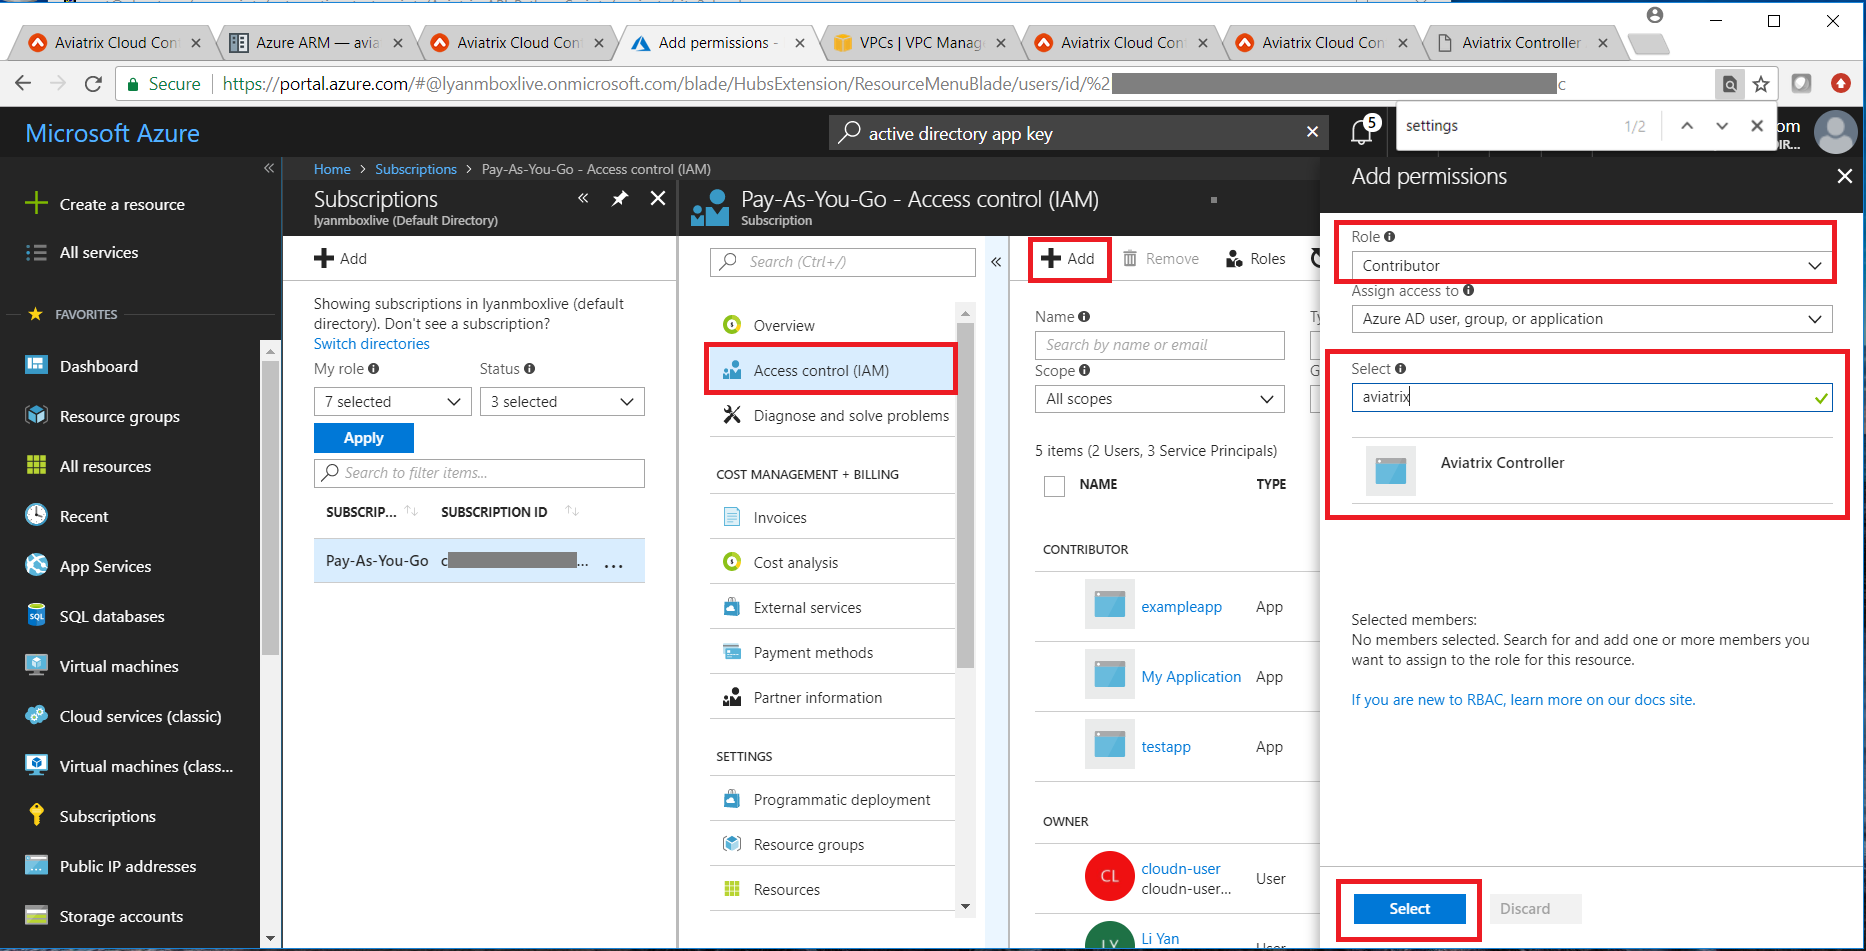
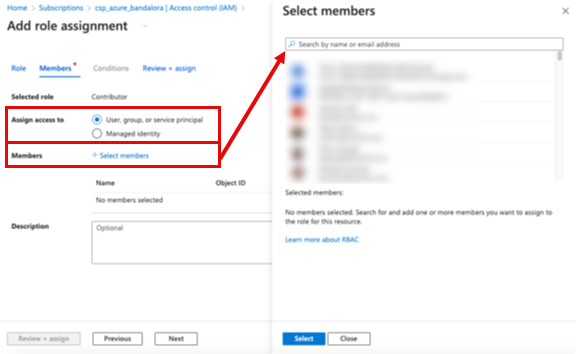
Click the Members tab and select Assign access to: User, group, or service principal.
-
For the Members field, click Select members to open a list.
-
In the Select members pane, locate the name of the Aviatrix application that you previously registered.
-
Select your Aviatrix application and click Select.
-
On the Add role assignment page, click Review + assign at the bottom of the page.
You might need to click Review + assign twice.
Your Aviatrix application is now assigned a Contributor role for your Azure subscription.
Create a Secret Identifier
After registering Aviatrix PaaS as an application and assigning it the Contributor role, create a Secret identifier. Microsoft Entra ID uses this Secret identifier to authenticate the Aviatrix PaaS application as a service principal.
| When you onboard your Azure account in Aviatrix PaaS console, you must enter this Secret Identifier value in the Onboard Cloud Account window. |
-
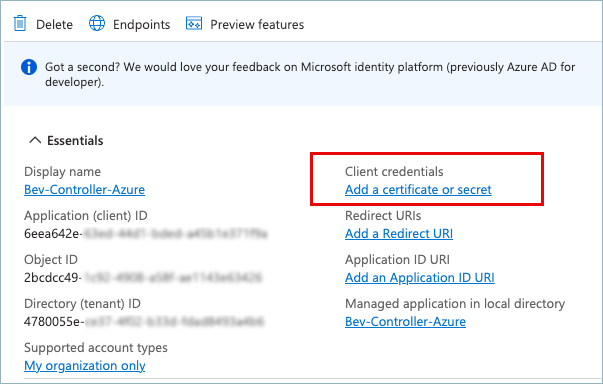
Navigate to App registrations and click the name of the application you are using.
-
Under Essentials, click Add a certificate or secret.
-
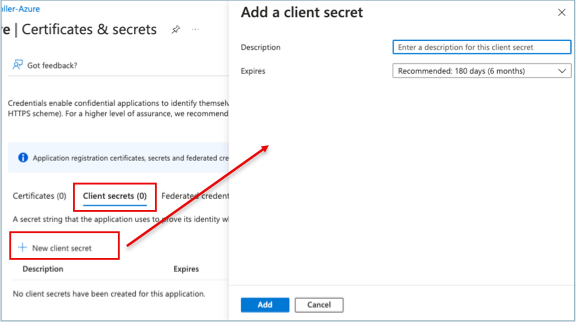
On the Client secrets tab, click +New client secret.
-
On Add a client secret, enter:
-
Description: Aviatrix
-
Expires: Set the time period to meet your corporate requirements.
Make a note of the expiration date and use an alerting system to send a reminder before the client secret expires. Azure does not send an alert prior to invalidating the client secret. If the client secret expires, you can have issues with your Aviatrix PaaS connection.
-
-
Click Add.
-
In the table on Certificates & secrets > Client secrets, copy and save the Value for the secret you created.
This is the Client Secret you must enter in the Aviatrix Onboard Cloud Account page.
This is the only opportunity to save this Value. You cannot view it again after you leave the Certificates & secrets window. It is not stored in Azure or in Aviatrix PaaS.
Next Step: Onboard Your Microsoft Azure Cloud Account
Use an Existing Application in Azure
If you already have an application in Azure that you want to use as a service principal, you must associate it with your Aviatrix PaaS account.
Perform the following steps in Azure to collect the information needed to connect with the Aviatrix PaaS console.
-
Log in to the Azure portal and search for "Subscriptions."
-
Copy the Subscription ID to a text file.
-
Search for and select App registrations.
-
Click the name of an existing registration and copy the Application ID and Directory ID into the text file with the Subscription ID.
-
If you have a Client Secret (part of the Azure Secret Identifier), add it to the list of saved IDs.
If you need to create a Client Secret, see Create a Secret Identifier.
Next Step: Onboard Your Microsoft Azure Cloud Account