OpenVPN® with SAML Authentication on OneLogin IdP
This guide provides an example on how to configure Aviatrix to authenticate against a OneLogin IdP. When SAML client is used, your Aviatrix Controller acts as the Identity Service Provider (ISP) that redirects browser traffic from client to IdP (e.g., OneLogin) for authentication.
Pre-Deployment Checklist
Before configuring SAML integration between Aviatrix and OneLogin, make sure the following is completed:
-
Aviatrix Controller is set up and running.
-
Have a valid OneLogin Account with admin access.
-
Download and install the Aviatrix SAML VPN client.
Aviatrix Controller
If you haven’t already deployed the Aviatrix Controller, follow the Controller Startup Guide.
OneLogin Account
A valid OneLogin account with admin access is required to configure the integration.
Aviatrix Controller
All users must use the Aviatrix VPN client to connect to the system. Download the client for your OS here.
Configuration Steps
Follow these steps to configure Aviatrix to authenticate against your OneLogin IDP:
-
Create a OneLogin SAML App for Aviatrix.
-
Create a SAML Endpoint in the Aviatrix Controller.
OneLogin SAML App
Before you start, pick a short name to be used for the SAML application name. In the notes below, we will refer to this as aviatrix_onelogin, but it can be any string.
We will use the string you select for the SAML application name to generate a URL for OneLogin to connect with Aviatrix. This URL is defined below as SP_ACS_URL. This URL should be constructed as:
"https://<your controller ip or host name>/flask/saml/sso/<aviatrix_onelogin>"
Replace <your Controller IP or host name> with the actual host name or IP address of your controller and <aviatrix_onelogin> with the string you chose to refer to the SAML application.
-
Log in to OneLogin as an administrator.
-
Add a new App (Apps > Add Apps).

-
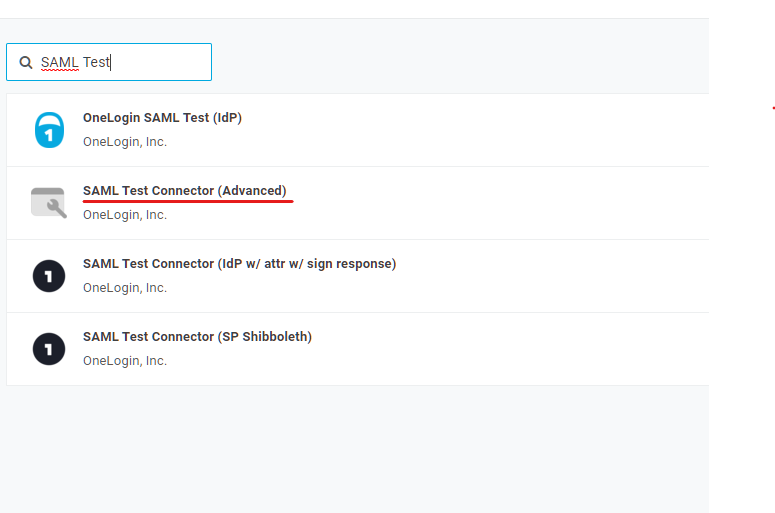
Search for "SAML Test Connector."
-
Select SAML Test Connector (Advanced).
-
Enter the Configuration values and click Save.
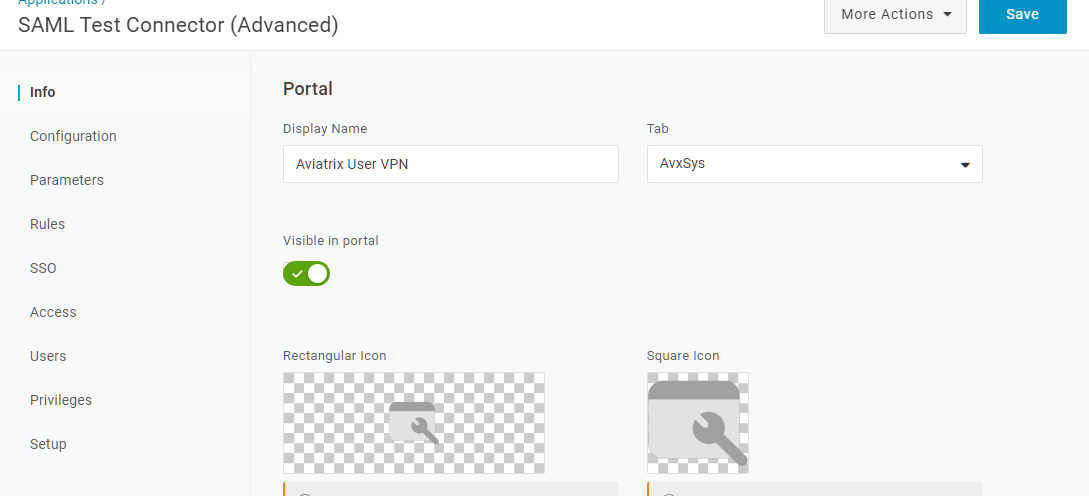
You can download the rectangular image from here:

You can download the square image from here:

-
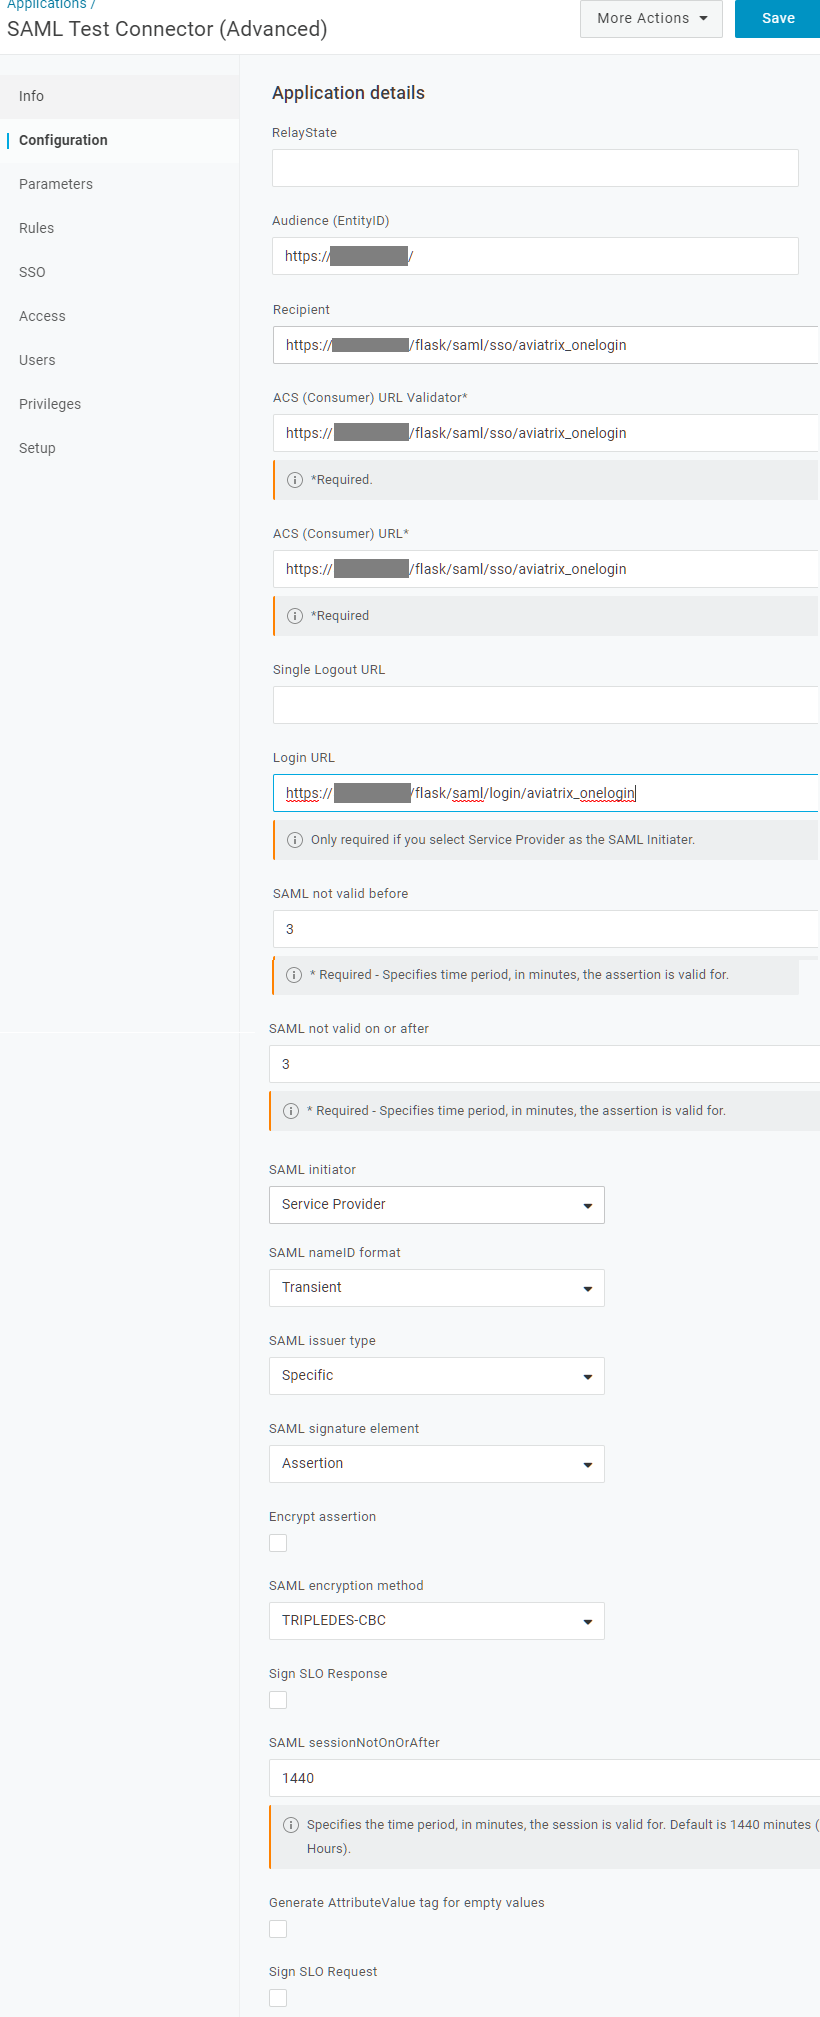
Click on Configuration tab.
-
Enter the values.
Field Value RelayState
Blank
Audience(Entity ID)
SP Entity ID
Recipient
SP_ACS_URL
ACS (Consumer) URL Validator
SP_ACS_URL
ACS (Consumer) URL
SP_ACS_URL
Single Logout URL
Blank
Login URL
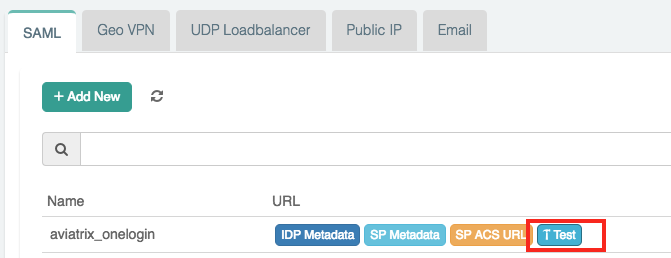
SP Login(Test) URL
SAML not valid before
3 (default)
SAML not valid on or after
3 (default)
SAML initiator
Service Provider
SAML nameID format
Transient
SAML issuer type
Specific (default)
SAML signature element
Assertion
Encrypt assertion
Unmarked checkbox (default)
SAML encryption method
TRIPLEDES-CBC (default)
Sign SLO Response
Unmarked checkbox (default)
SAML sessionNotOnOrAfter
1440 (default)
Generate AttributeValue tag for empty values
Unmarked checkbox (default)
Sign SLO Request
Unmarked checkbox (default)
-
Click Save.
-
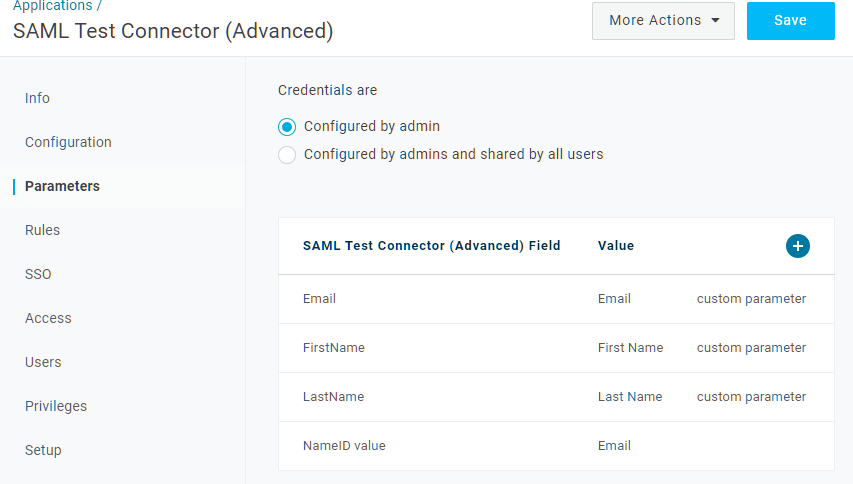
Select the Parameters tab.
-
Add the following custom parameters (case sensitive).
Field Value Flags Email
Email
Include in SAML assertion
FirstName
First Name
Include in SAML assertion
LastName
Last Name
Include in SAML assertion
-
Optionally, add a field to map to the profile in Aviatrix.
Field Value Flags Profile
(User Defined)
Include in SAML assertion
-
Click Save.
-
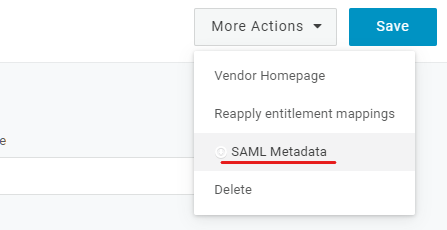
Click on More actions dropdown menu.
-
Copy the Metadata URL.
Aviatrix Controller SAML Endpoint
-
Log in to your Aviatrix Controller.
-
Select OpenVPN > Advanced on the left sidebar.
-
select the SAML tab.
-
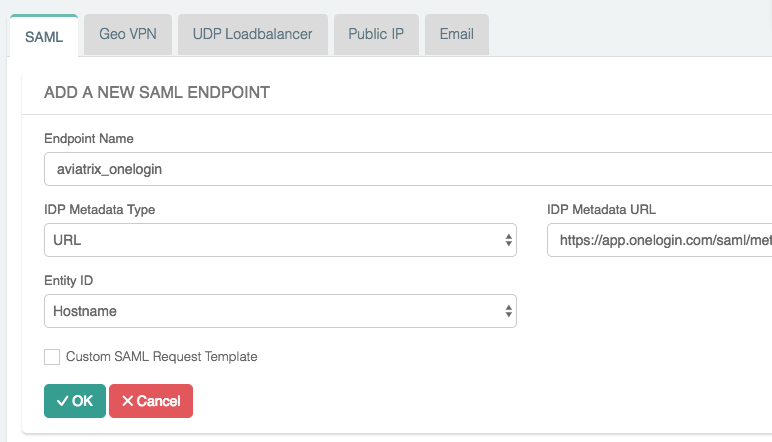
Click + Add New.
-
Follow the table below for details on the fields in the table:
Field Description Endpoint Name
Pick
IPD Metadata Type
URL
IDP Metadata Text/URL
Paste in the Metadata URL obtained from the OneLogin app.
Entity ID
Select Hostname
Custom SAML Request Template
Unmarked checkbox
Creating a VPN User
-
Log in to the Aviatrix Controller.
-
Select OpenVPN® > VPN Users on the left sidebar.
-
Click + Add New.
-
Select the VPC ID and LB/Gateway Name for your SAML Gateway.
-
Enter a name in the User Name field.
-
Enter any valid email address in the User Email field (this is where the cert file will be sent). Alternatively, you can download the cert if you do not enter an email address.
-
Select the SAML Endpoint.
-
Click OK.
