Setting up Okta SAML with Profile Attribute
This guide demonstrates the use of the Profile attribute in Okta so each SAML user can be assigned a different VPN profile.
How a VPN Profile Works
The VPN profiles defined at the Controller/OpenVPN/Profiles contain an egress control policy. They are attached to the VPN users defined at Controller/OpenVPN/VPN Users for controlling their VPN egress traffic. Users without a profile is the same as having a profile with an allow-all policy, i.e., their egress traffic are unrestricted.
For SAML VPN, the SAML user definition at the IDP has a Profile attribute for specifying a VPN profile, overriding the corresponding user’s VPN profile assigned at the Controller. If unspecified, the corresponding VPN profile assigned at the Controller will be used.
Setting up the Okta Profile Attribute
-
Define a new attribute in the Okta User template for storing the VPN profile name.
-
Define an attribute mapping for the new attribute using the name Profile so that the SAML application knows how to compose the Profile information in the SAML response.
-
Assign VPN profile to each SAML user.
-
Validate the setup.
Defining a New Attribute
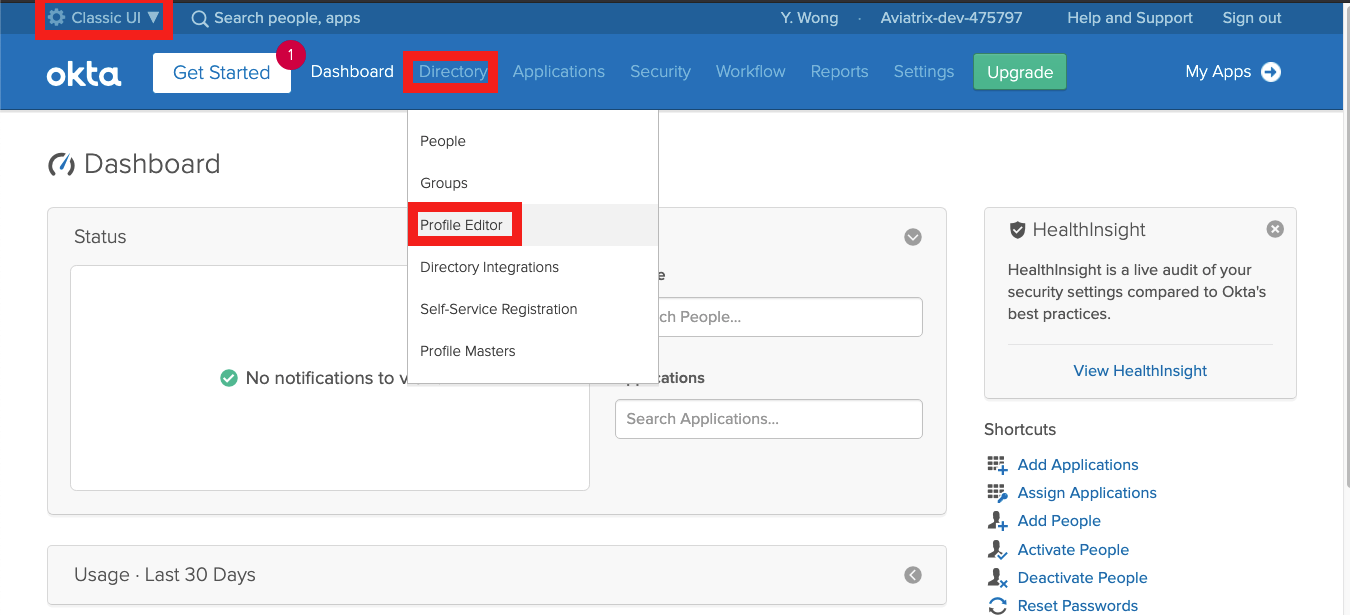
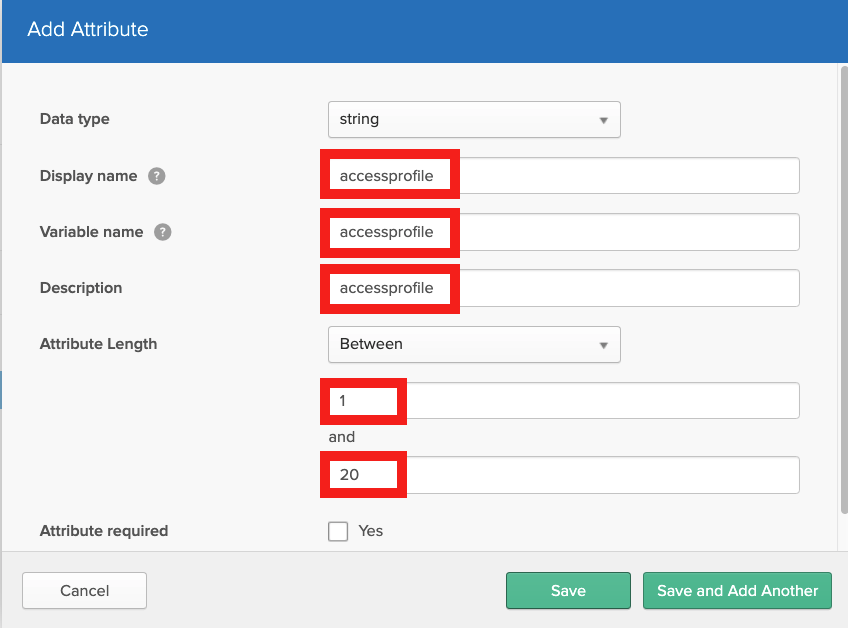
At Okta, define a new attribute in the User definition template using Okta/Directory/Profile Editor. In this example, the new attribute is named accessprofile and it can store a string of up to 20 characters.
-
Open Profile Editor at Okta/Directory/Profile Editor.
-
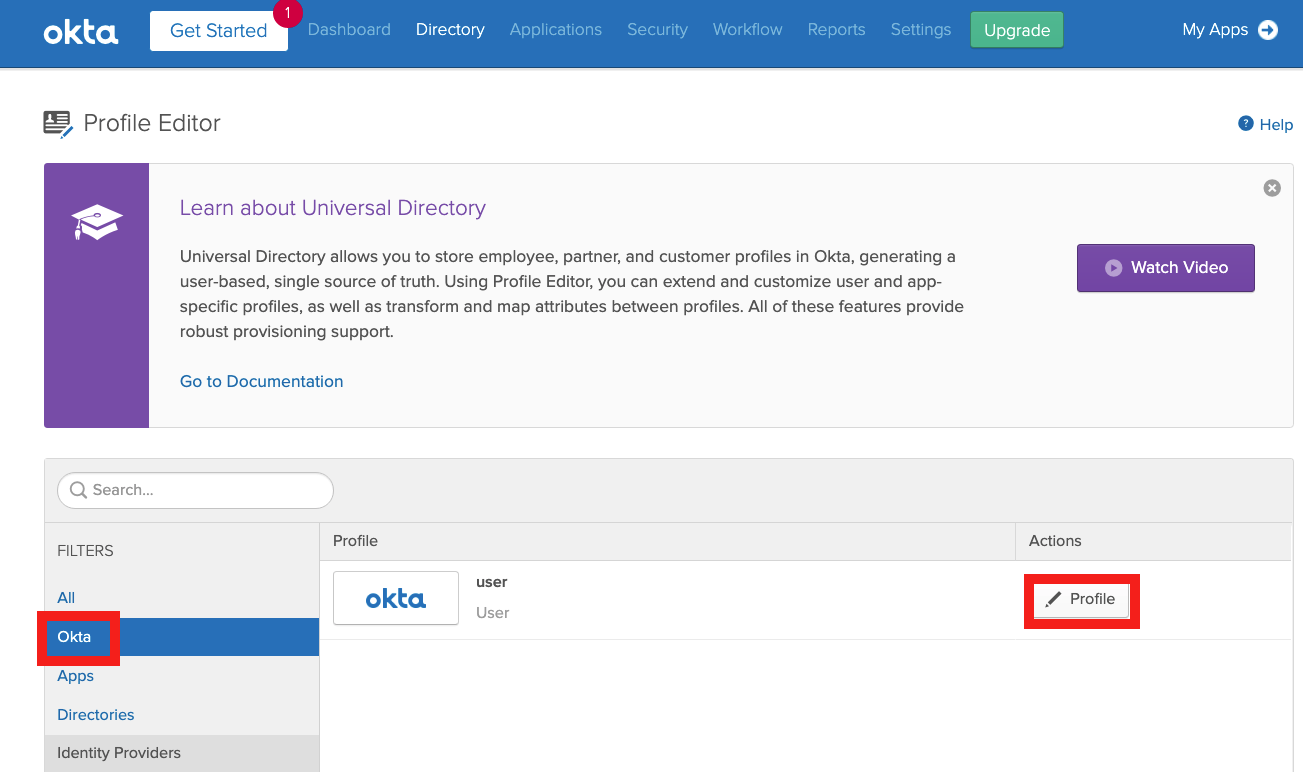
Click Okta on the left navigation bar to find the User definition template and click Profile to open.
-
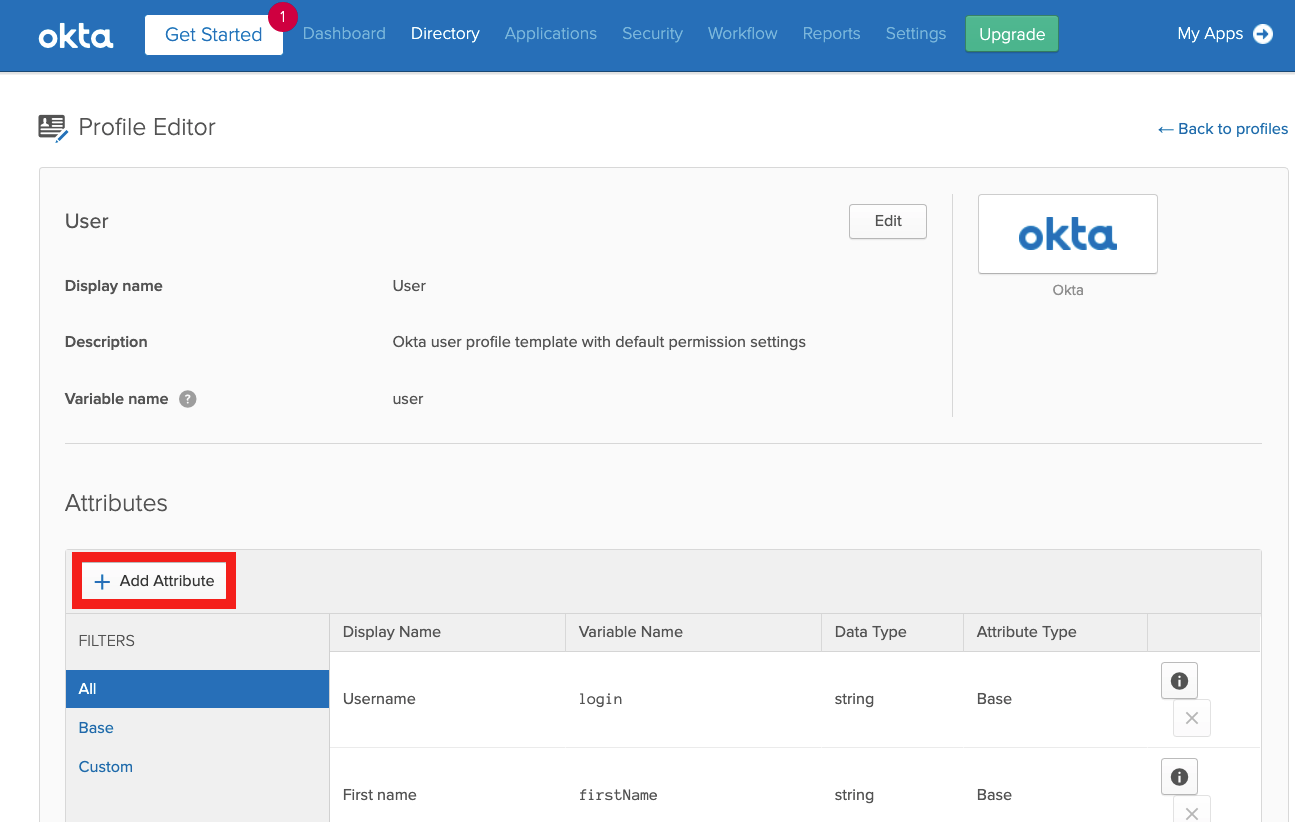
Click Add Attribute to add a new attribute in the user template.
-
Define a string attribute with a name; in this example, we use accessprofile.
Defining an Attribute Mapping
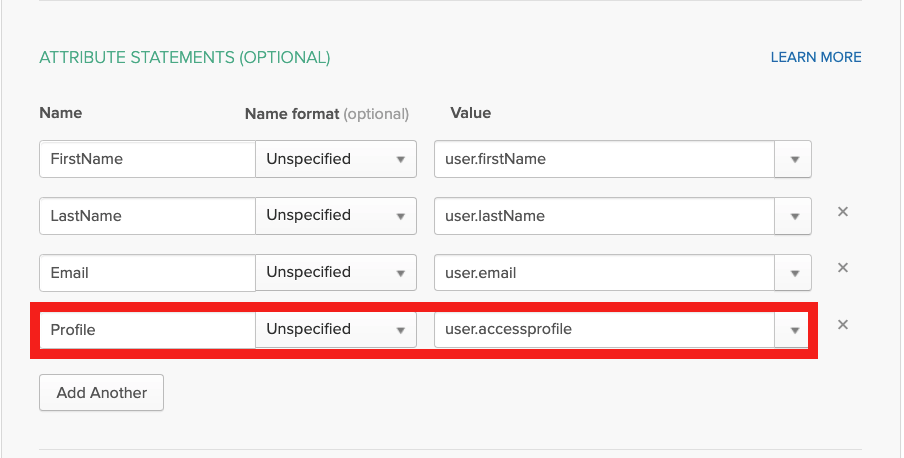
In the SAML application (Okta/Applications/<your-vpn-saml-app>/General/SAML Settings/Edit), define a mapping for the new attribute (e.g., accessprofile) using the name Profile. Note that the name Profile is required to be an exact match and the new attribute name is pre-qualified with the keyword user for referencing a property in the user template.
Assigning the VPN Profile to Each SAML User
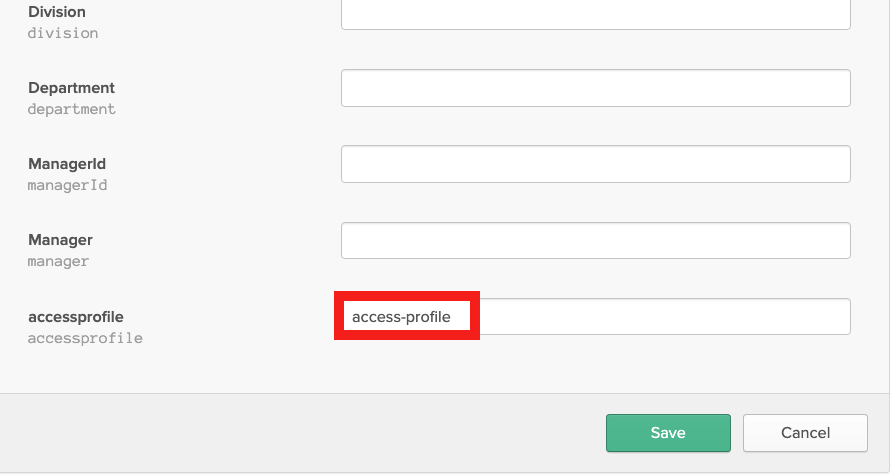
For each SAML application user, edit the user record in the Okta directory for assigning the VPN profile (Okta/Directory/People/<your-user>/Profile/Edit). In this example, the VPN profile defined at the Controller is named access-profile. Currently, only one profile is allowed per SAML user.
Validation
The following example illustrates the use of the SAML user’s Profile attribute explained in previous sections:
-
It uses an Aviatrix VPN Gateway that has certificate sharing enabled. That is, only one VPN user is created at the Aviatrix VPN Gateway. The corresponding ovpn file will be shared by all SAML VPN users defined in Okta.
-
Two VPN profiles are created: The default-profile contains a base deny-all policy and is attached to the VPN user, stopping all VPN egress traffic by default. The access-profile contains the desired egress-traffic-allow policies. As a result, only the SAML users who have his/her Profile attribute set to access-profile will have the right VPN access while others will be restricted by the default-profile.
-
For testing purposes, create two SAML users in Okta, respectively, with and without setting the Profile attribute to access-profile. Verify their VPN connection by checking the displayed profile of their VPN sessions at Controller/Dashboard.
Here are the steps for setting up the example:
-
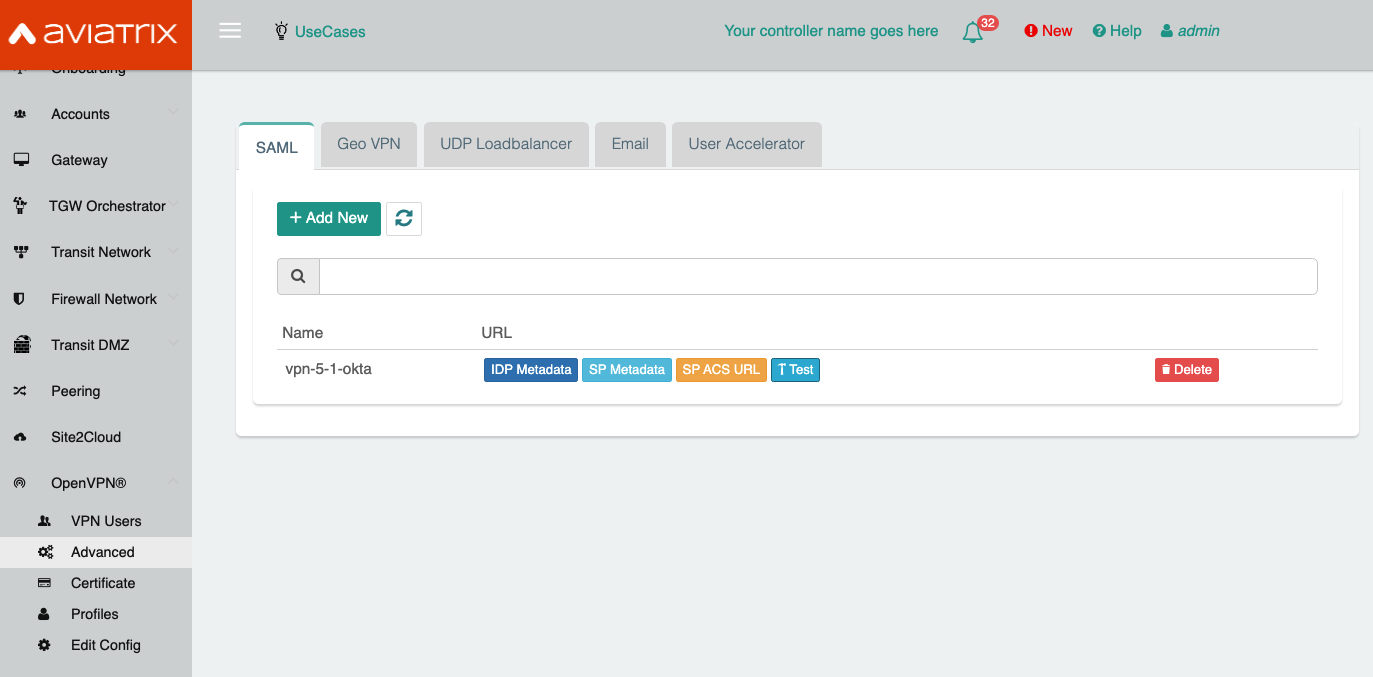
Follow the guide OpenVPN® with SAML Authentication on Okta IDP to configure the Controller to authenticate against the Okta IDP. The Aviatrix SAML Endpoint in this example is named vpn-5-1-okta (Controller/OpenVPN/Advanced/SAML):
-
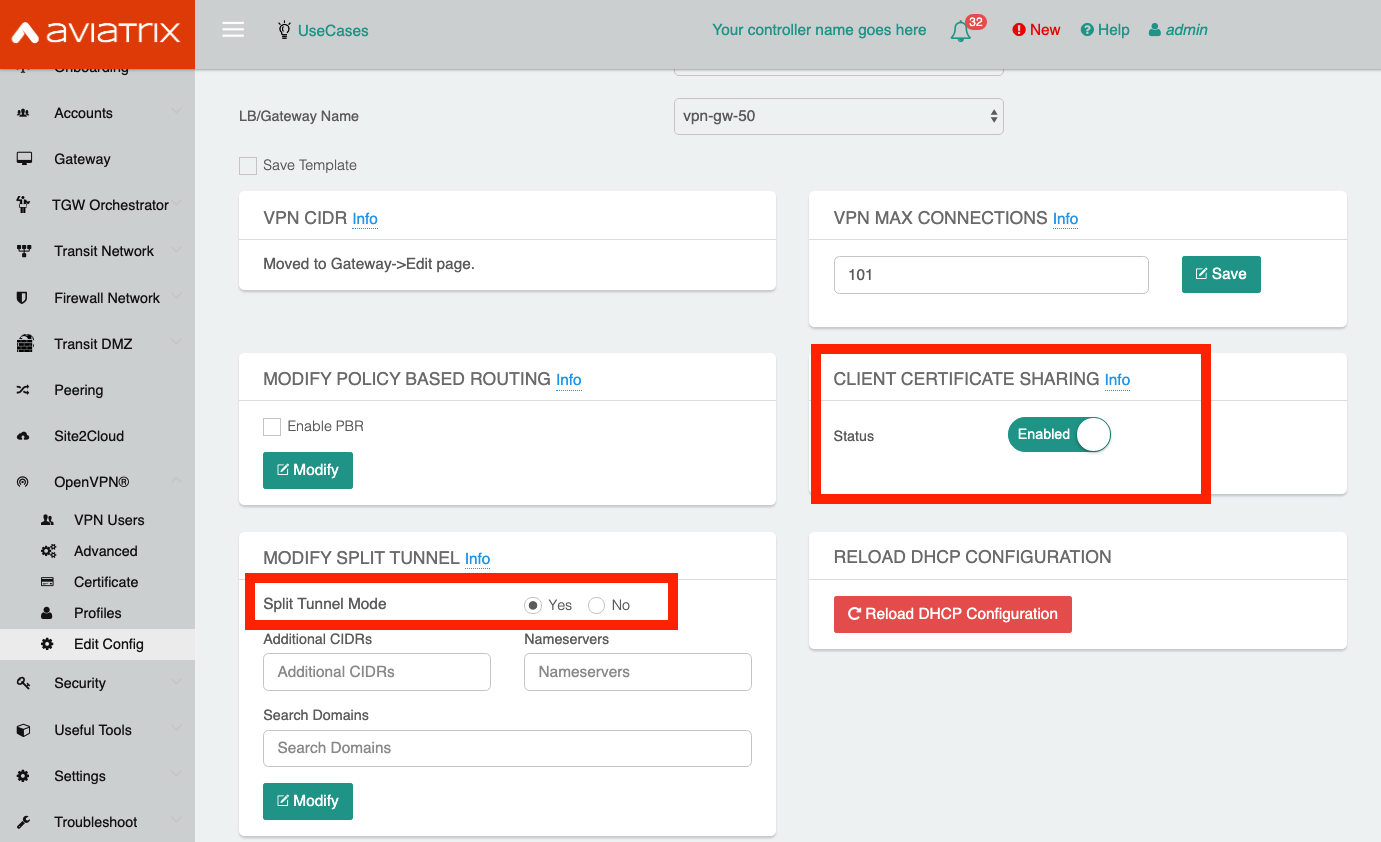
Enable certificate sharing and split tunnel (Controller/OpenVPN/Edit Config/<your-vpn-gw>):
-
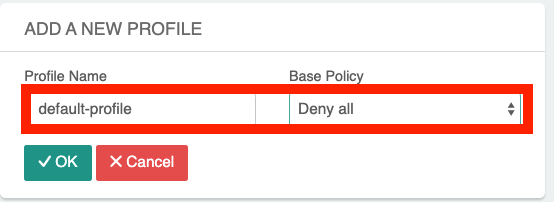
Create a default-profile with base deny-all policy (Controller/OpenVPN/Profiles/Add new). This default-profile will be attached to the VPN user, i.e., no egress traffic is allowed by default.
-
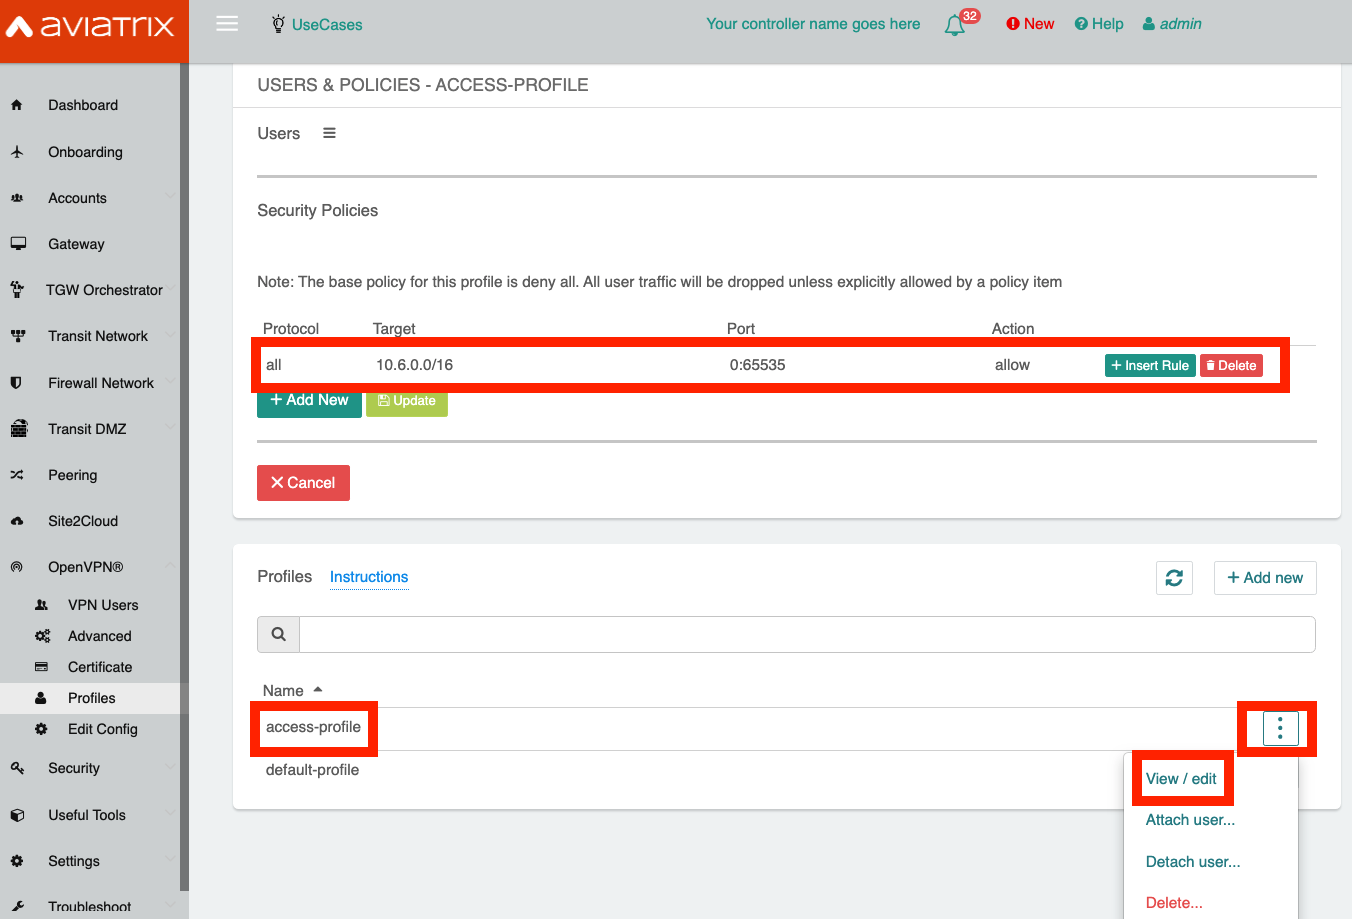
Create a second profile the access-profile with base deny-all policy and subsequently edit it to add the allowed egress traffic (Controller/OpenVPN/Profiles/<access-profile>/Edit). This VPN profile will be assigned to the SAML User at the Okta IDP. For the purpose of this test, it can contain any dummy policy:
-
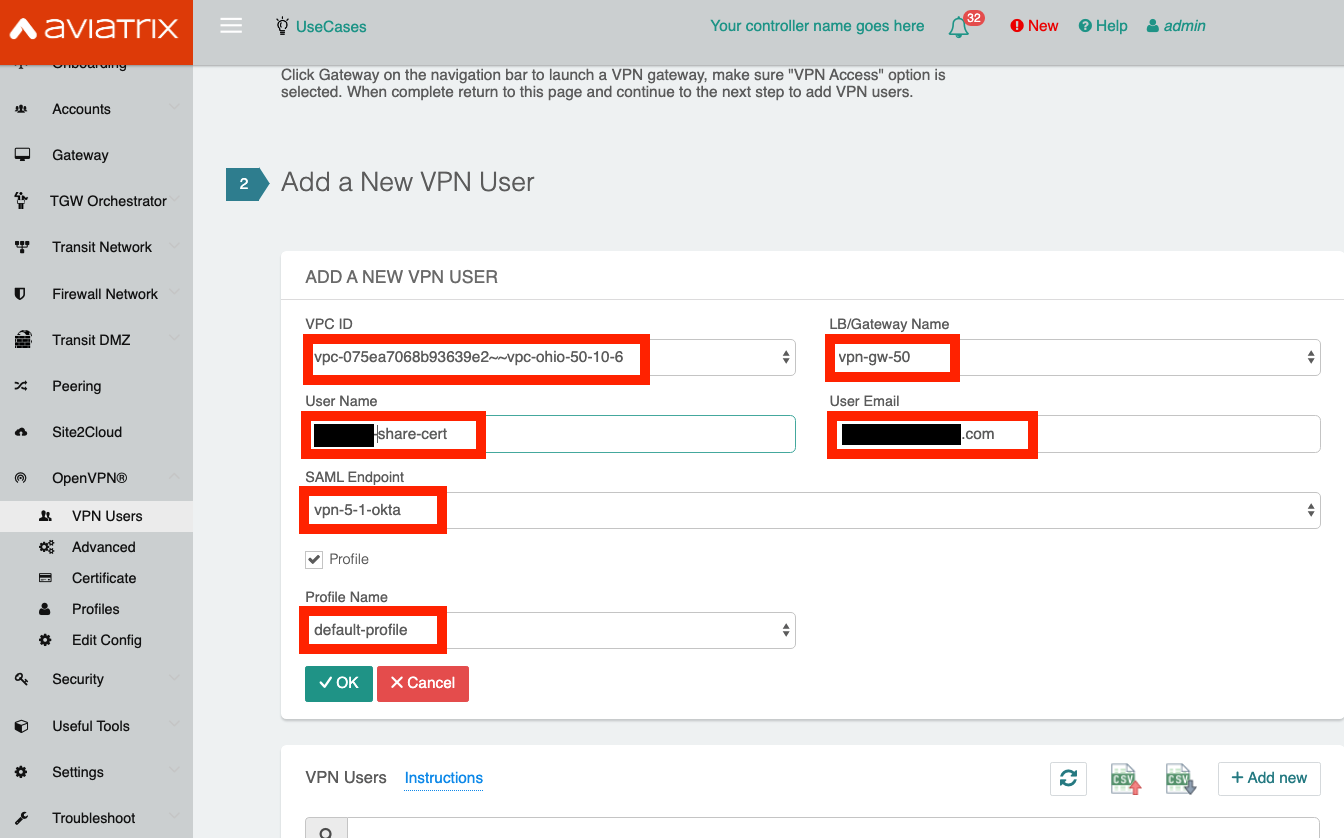
Create one VPN user with the default-profile at the Aviatrix VPN Gateway (Controller/OpenVPN/VPN Users/Add new):
-
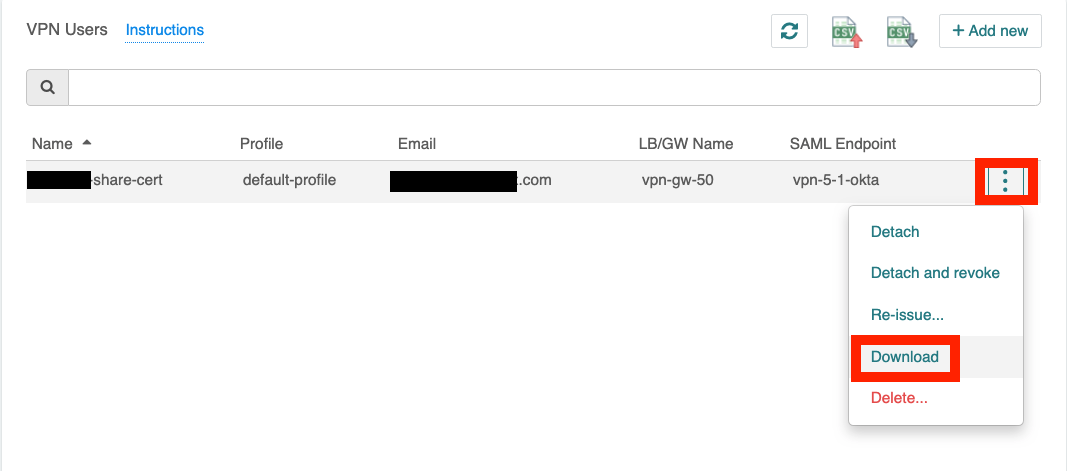
Download the ovpn file of the VPN user just created and load it into the Aviatrix VPN client.
-
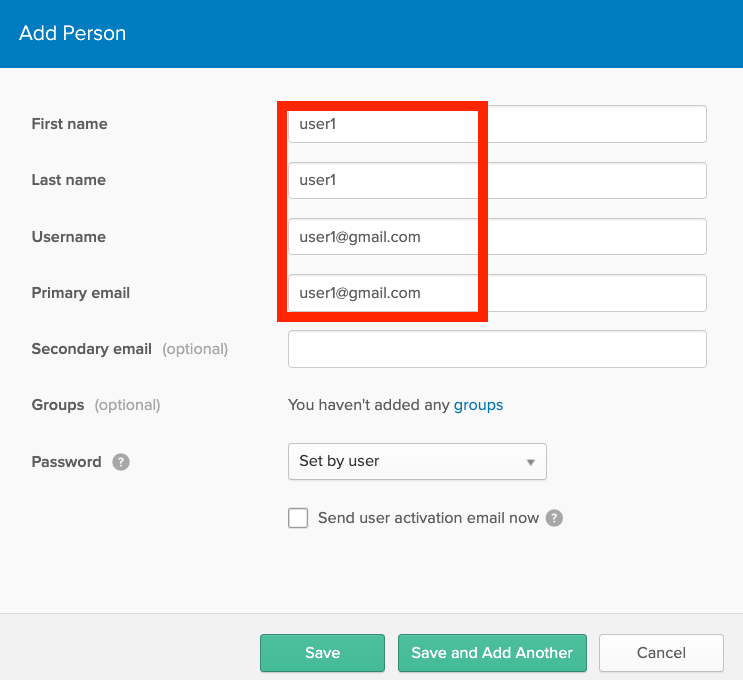
Create two users in Okta (Okta/Directory/People/Add Person). For ease of identification, user1 is given an email address at gmail.com and user2 at yahoo.com.
-
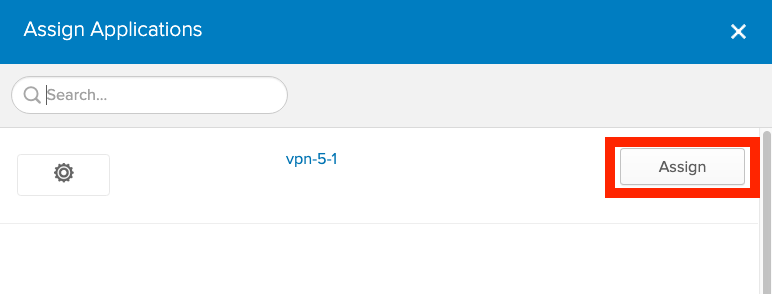
Assign the SAML VPN application to the two users in Okta (Okta/Directory/People/<your-saml-user>/Applications/Assign Applications). In this example, vpn-5-1 is our VPN SAML application.
-
Follow Steps 1 and 2 in Setup Okta Profile attribute to define the Profile attribute in Okta.
-
Follow Assign VPN profile to set user1’s Profile attribute to access-profile.
-
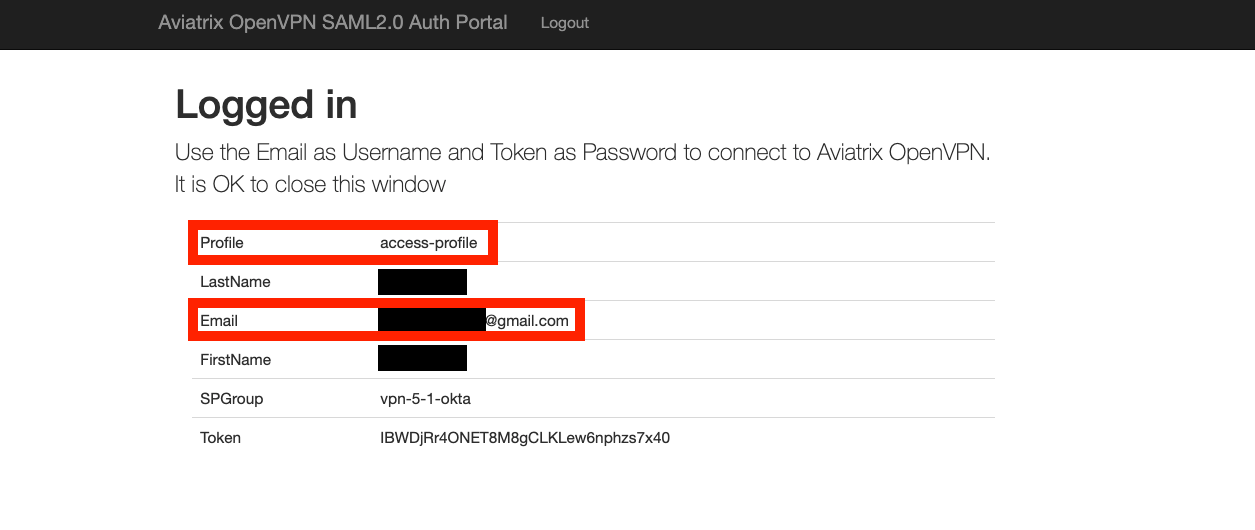
From the Aviatrix VPN client, make a VPN connection using user1 Okta credential and observe the result at Controller/Dashboard. Repeat the same for user2. The following screenshots show the results.
-
User1 (gmail.com) with Profile attribute set to access-profile:
-

-
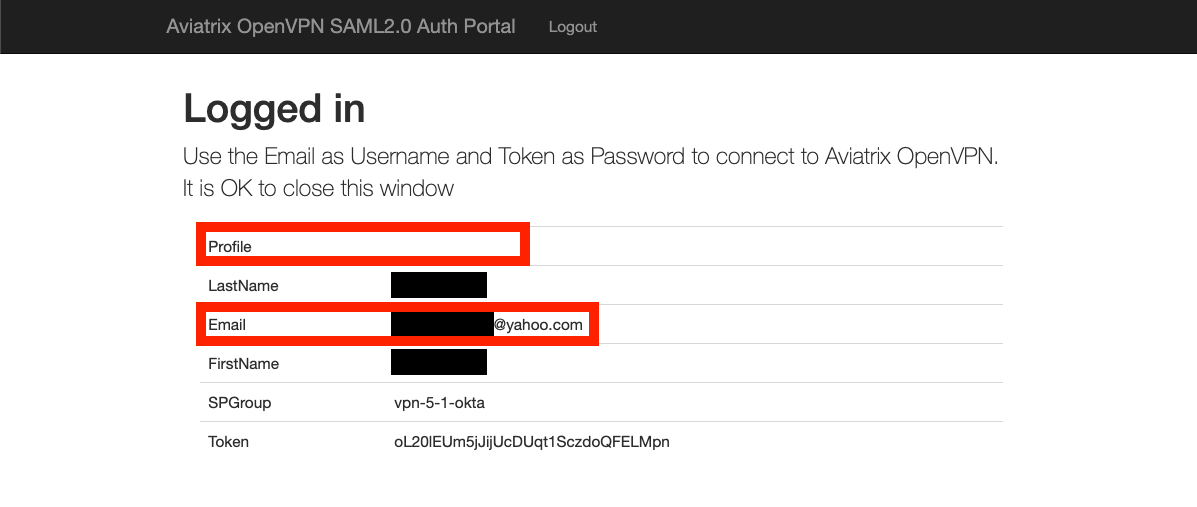
User2 (yahoo.com) without setting the Profile attribute:
