Setting up PingOne for Customers Web SAML App with Profile Attribute
This guide demonstrates the use of the Profile attribute in PingOne for Customers so each SAML user can be assigned a different VPN profile.
How a VPN Profile Works
The VPN profiles defined at the Controller/OpenVPN/Profiles contain egress control policy. They are attached to the VPN users defined at Controller/OpenVPN/VPN Users for controlling their VPN egress traffic. Users without a profile is the same as having a profile with an allow-all policy, i.e., their egress traffic are unrestricted.
For SAML VPN, the SAML user definition at the IDP has a Profile attribute for specifying a VPN profile, overriding the corresponding user’s VPN profile assigned at the Controller. If unspecified, the corresponding VPN profile assigned at the controller will be used.
Setting up PingOne for Customers Profile Attribute
-
Define a new User attribute in the PingOne for customers portal for storing the VPN profile name.
-
Define an attribute mapping for the new attribute using the name Profile so that the web SAML application knows how to compose the Profile information in the SAML response.
-
Assign VPN profile to each SAML user.
-
Validate the setup.
Defining a New User Attribute
|
This step is usually completed by the PingOne for Customers Admin. |
-
Log into the PingOne Admin portal.
-
Follow PingOne documentation to add an User attribute.
-
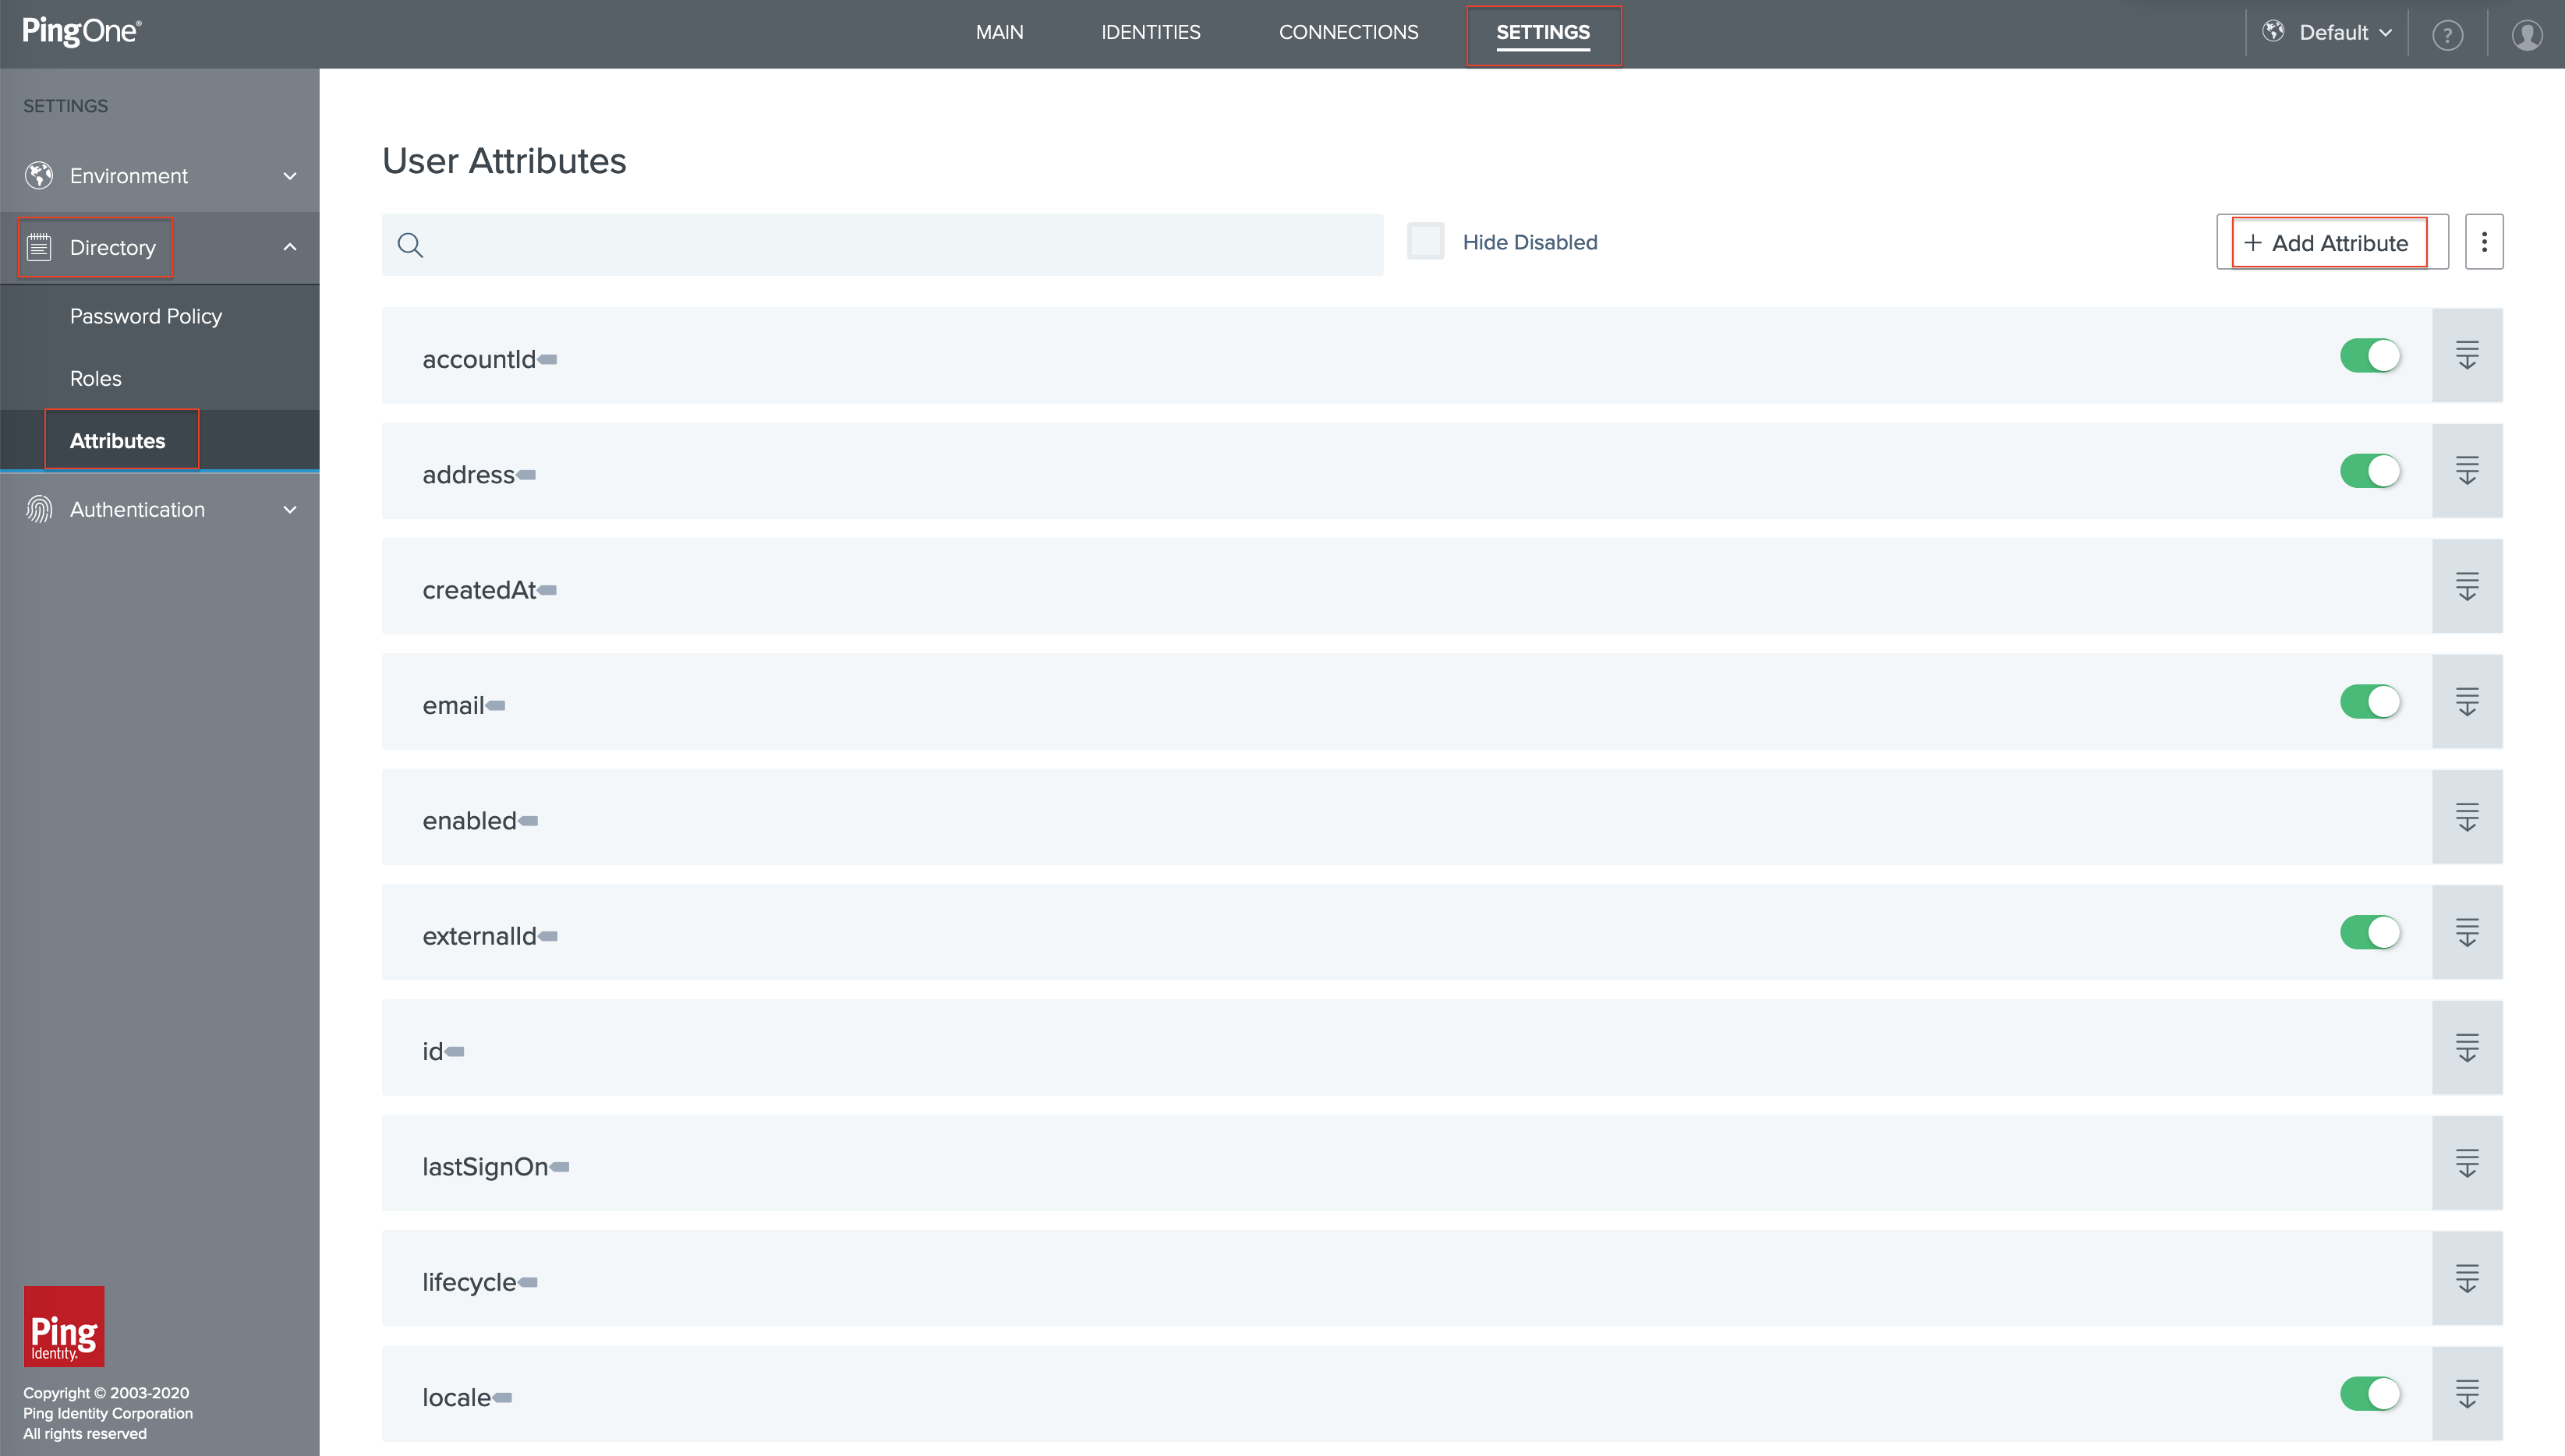
On the top of the page, click Settings.
-
On the left, under Directory, click Attributes.
-
Click + Add Attribute.

-
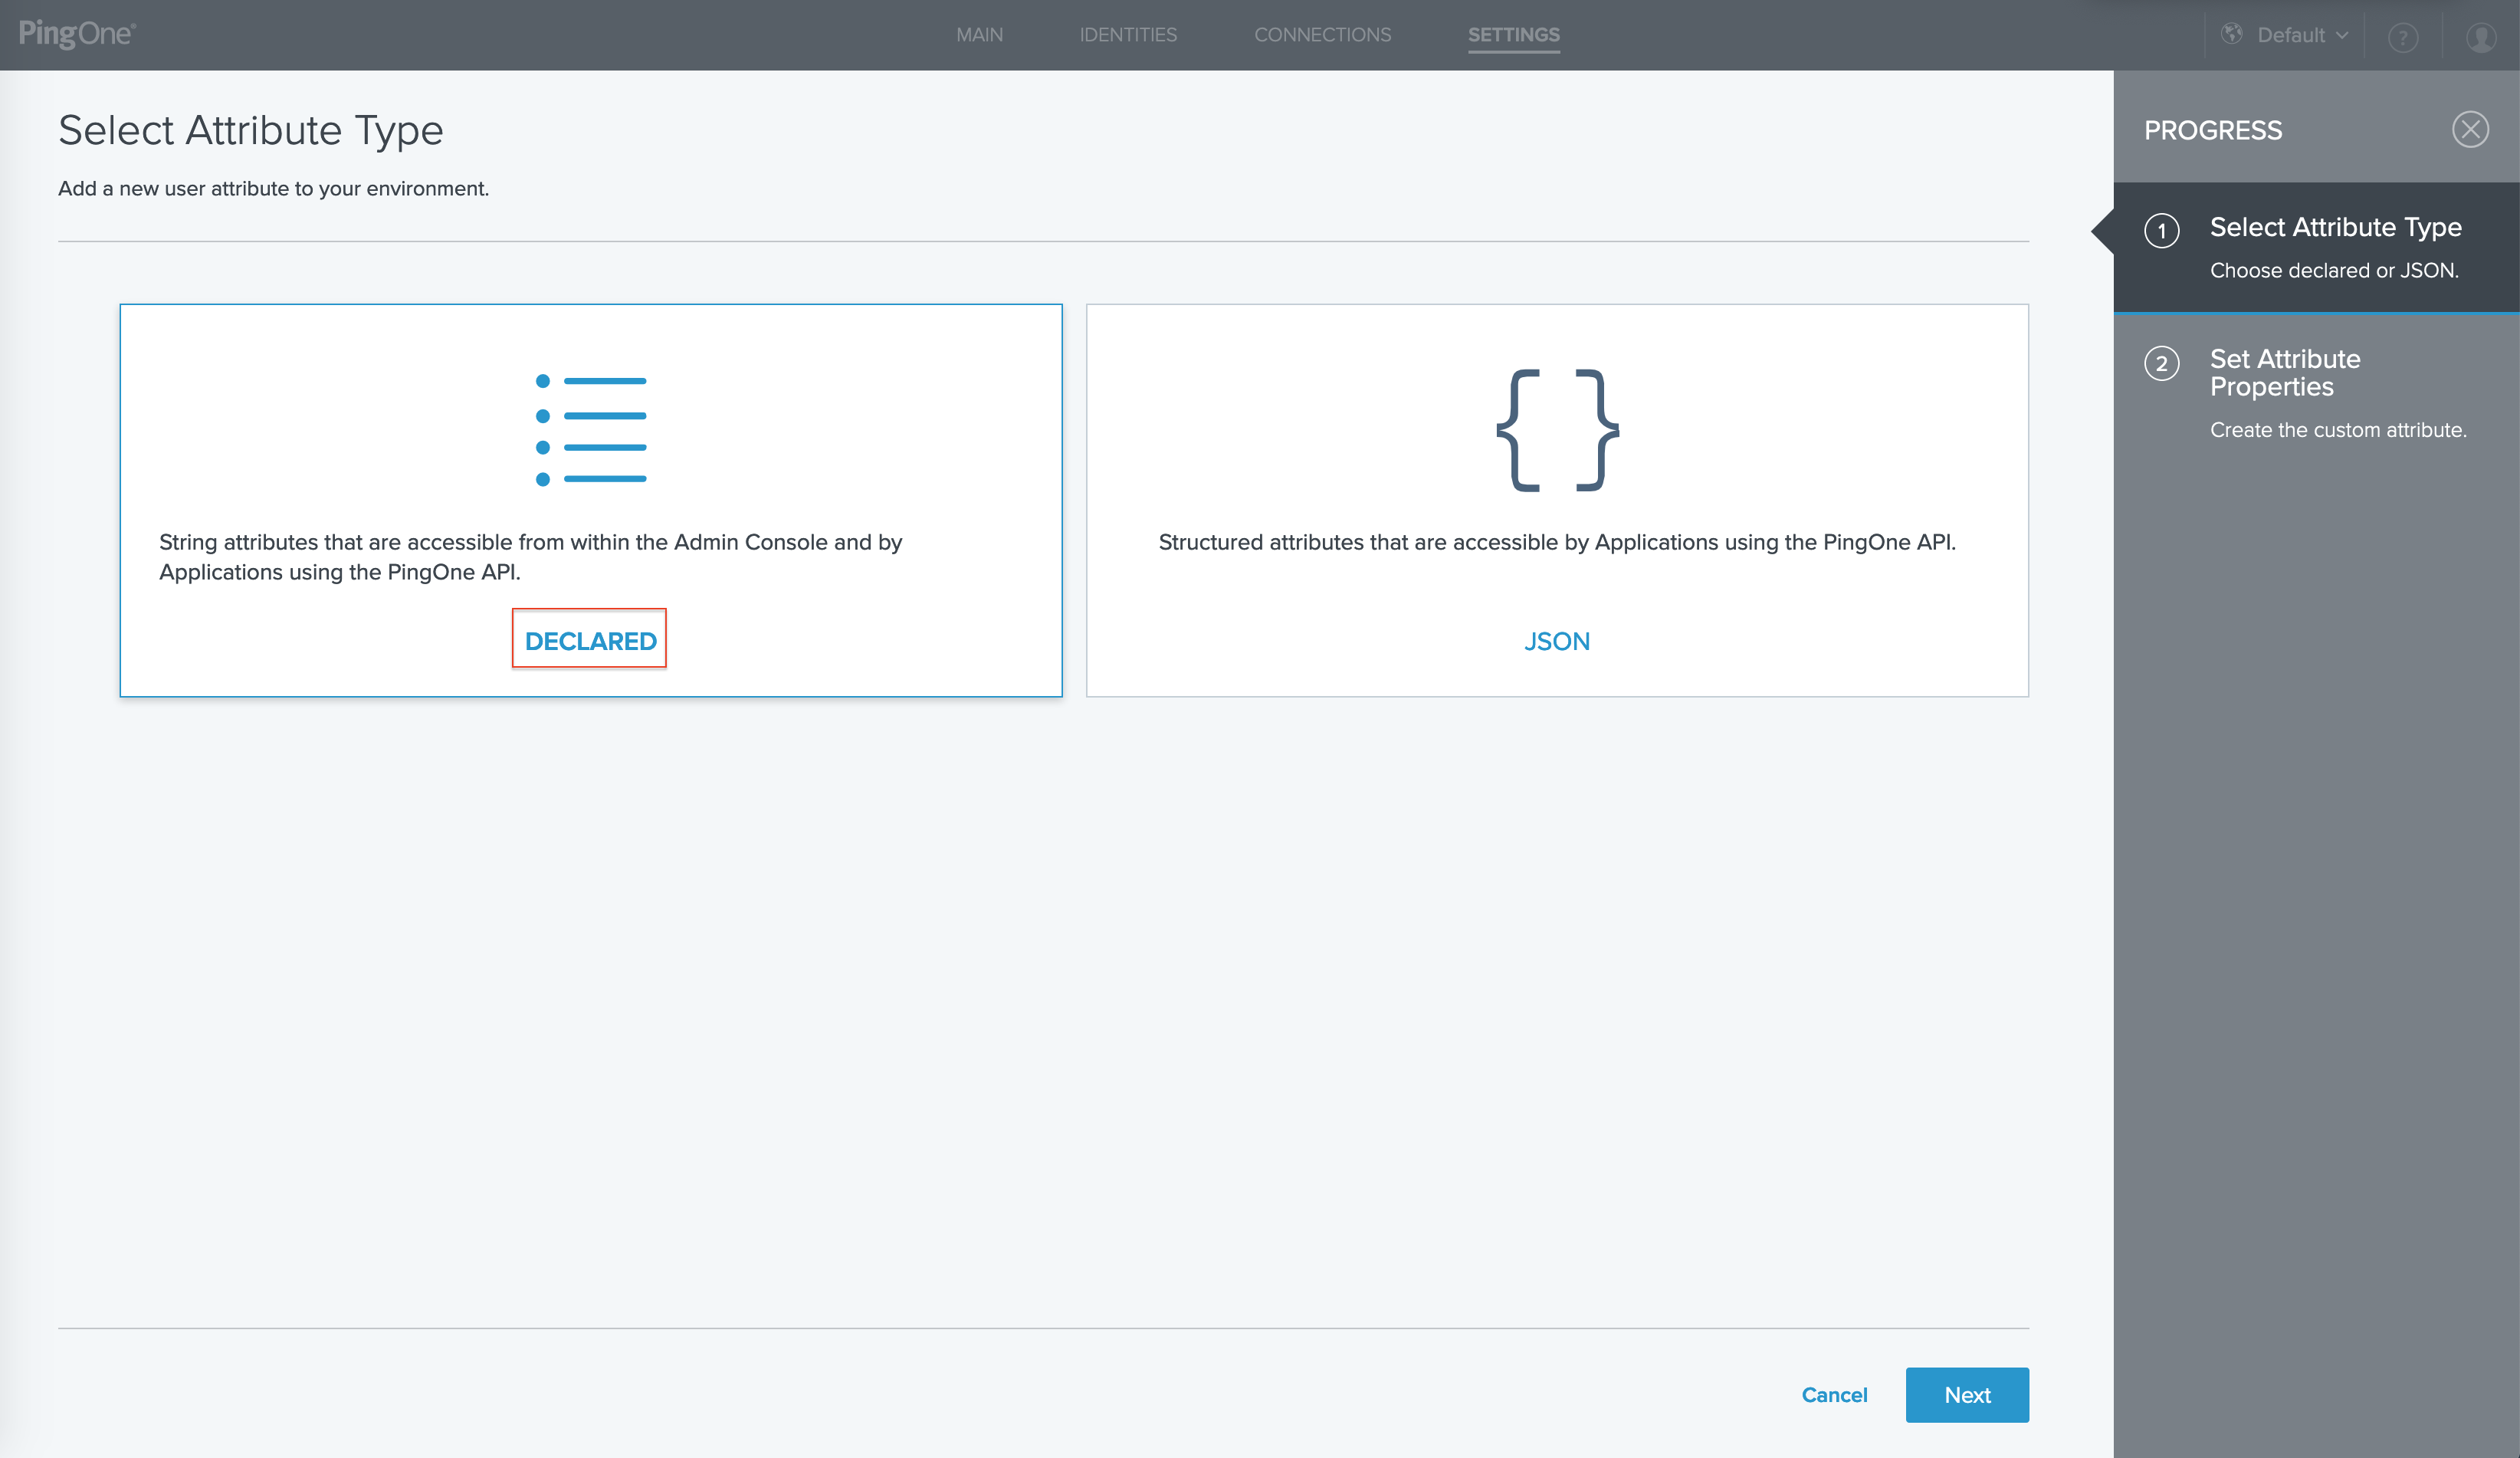
Click Declared.

-
Click Next.
-
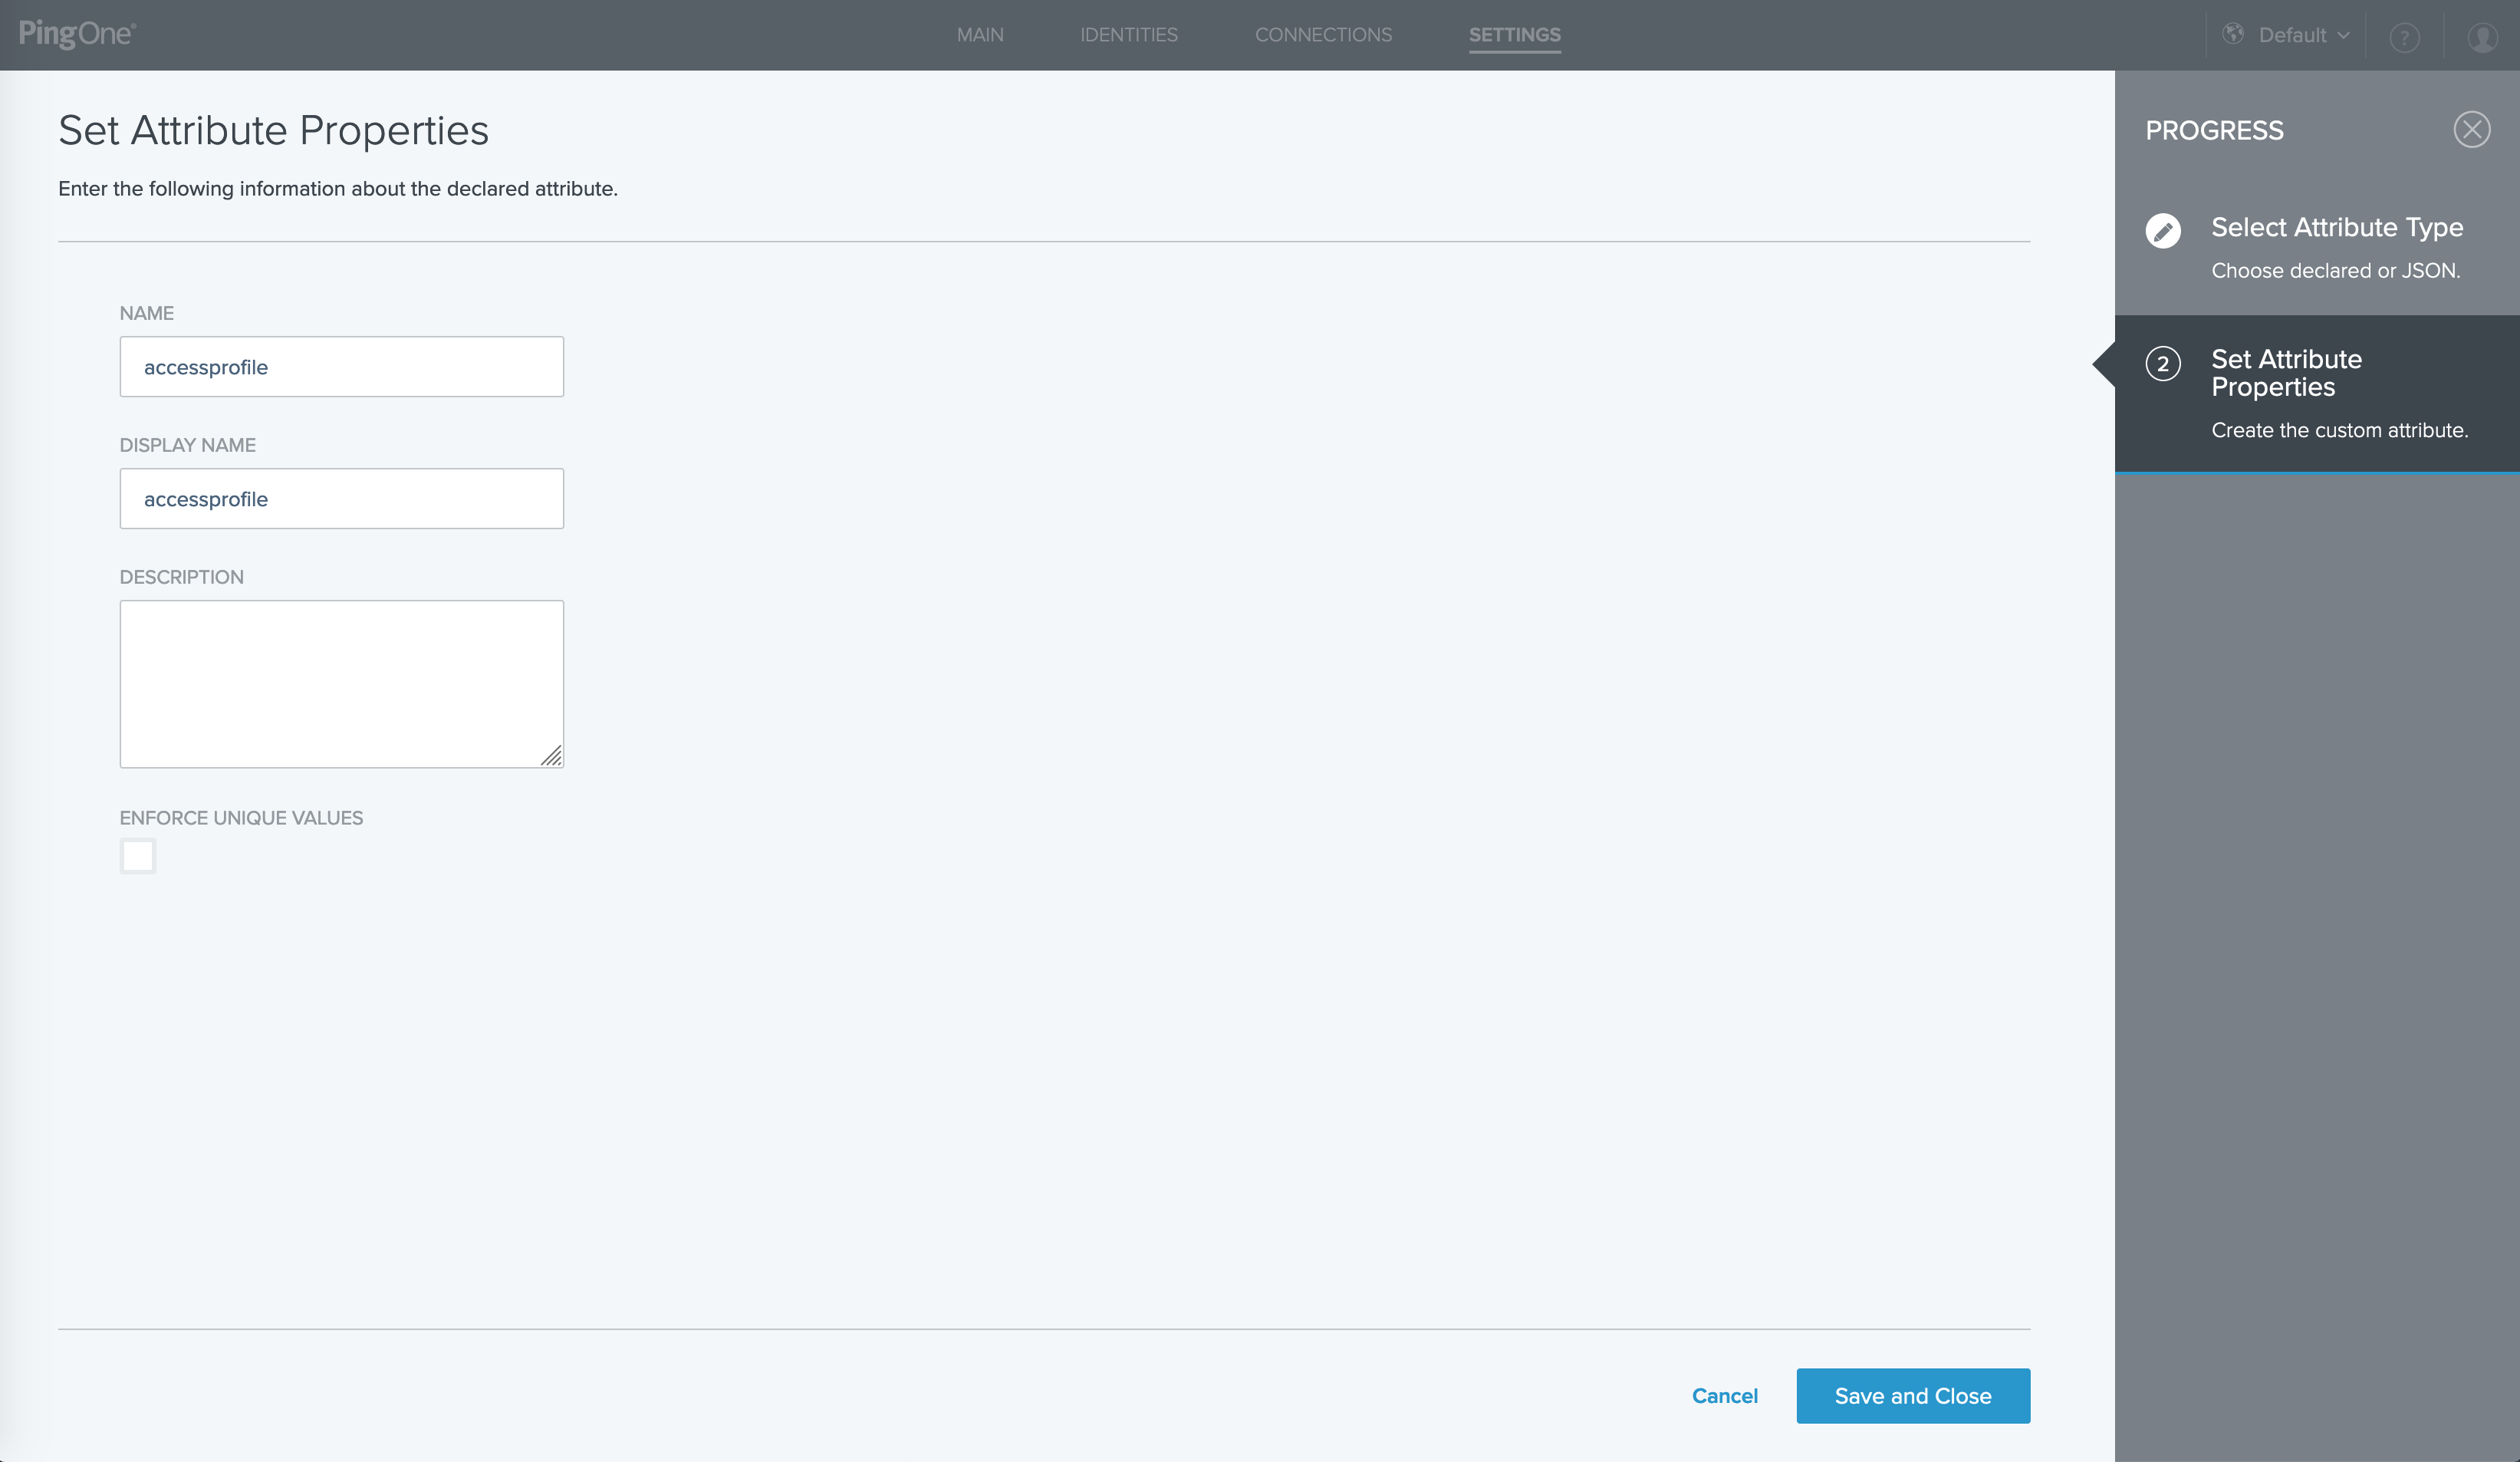
Enter the following information to create the custom user attribute:
Field Value Description Name
accessprofile
A unique identifier for the attribute.
Display name
accessprofile
The name of the attribute as you want it to appear in the user interface.
Description
(optional)
A brief characterization of the application.
Enforce unique values
Uncheck
Option to require the attribute values be unique across the environment
In this example, the new user attribute is named accessprofile.

-
Click Save and Close.
Defining an Attribute Mapping
|
This step is usually completed by the PingOne for Customers Admin. |
-
On the top of the page, click Connections.
-
Click Applications on the left.
-
Locate the Web SAML application to add this custom User attribute.
-
Click the details icon to expand the Web SAML application, and then click the pencil icon.
-
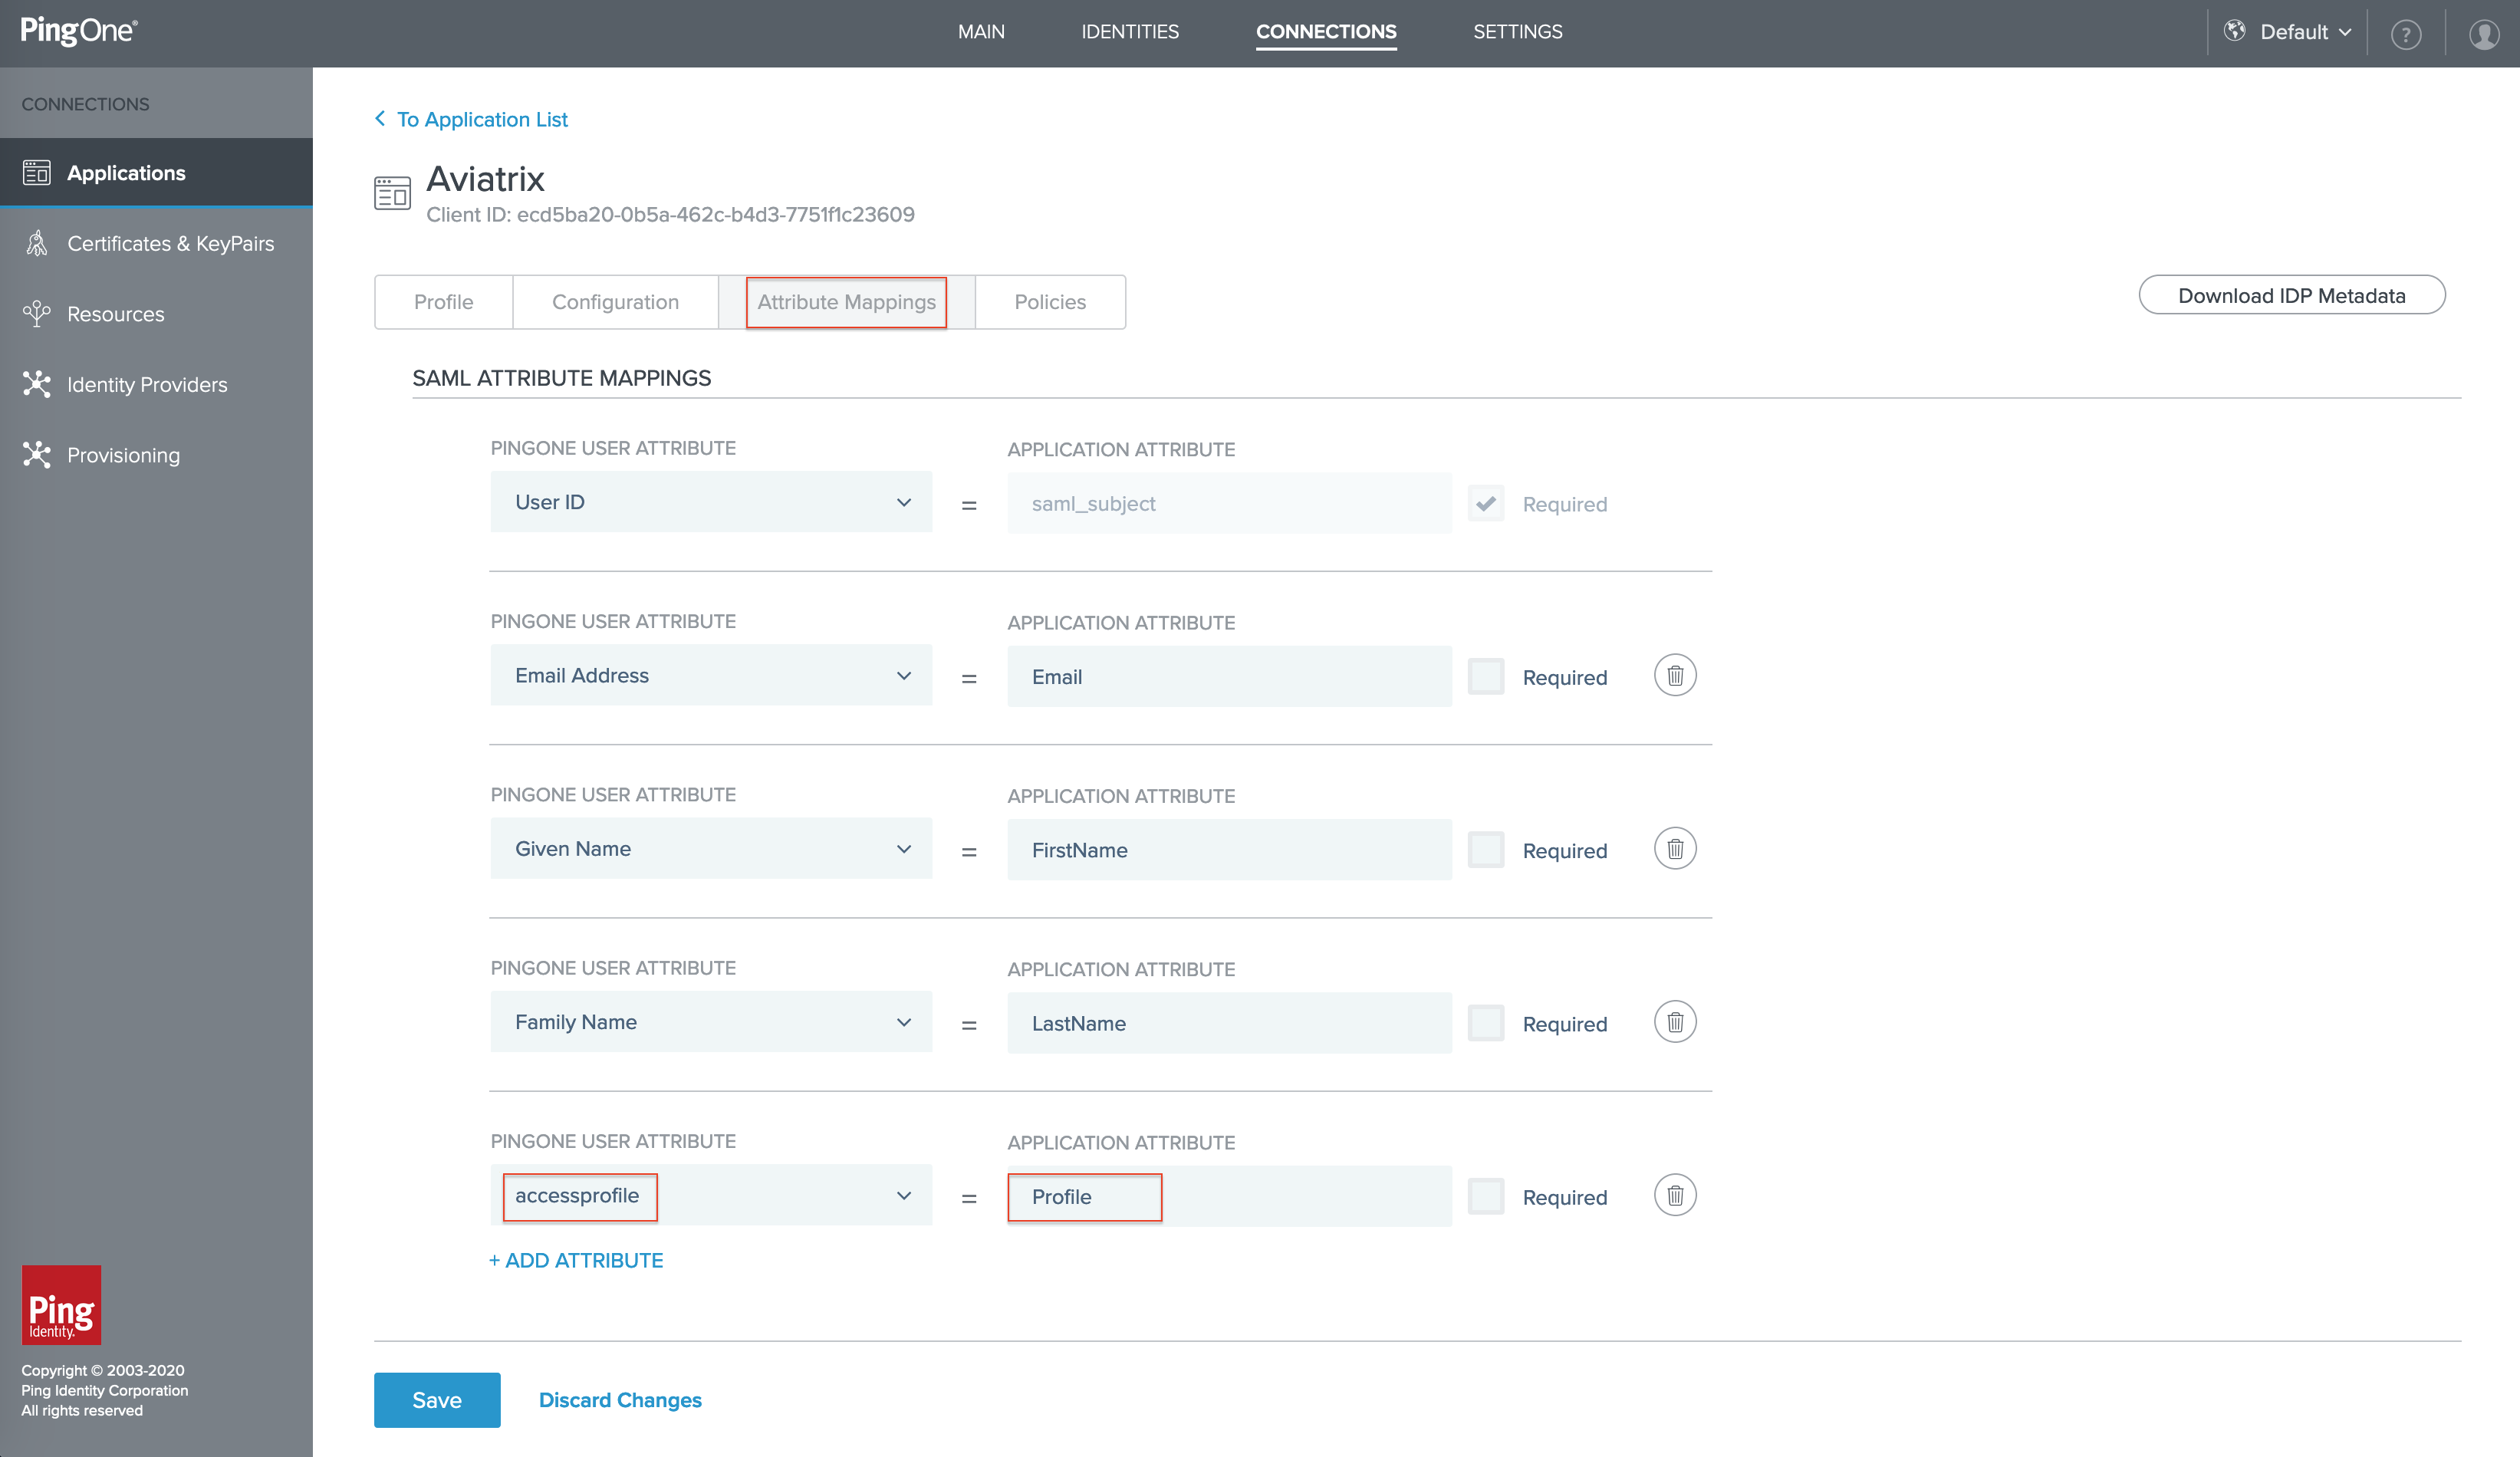
Click Attribute Mappings.
-
For updating attribute mapping, click the button +Add Attribute and then select PingOne Attribute to map PingOne user attribute to an application attribute as below.
PingOne Attribute
Application Attribute
accessprofile
Profile
The application attribute Profile is required to be an exact match so that Aviatrix Controller can process in the SAML response.

Assigning VPN Profile to Each SAML User
|
This step is usually completed by the PingOne for Customers Admin. |
For each SAML application user, edit the user profile for assigning the VPN profile.
-
On the top of the page, click Identities.
-
Locate the user you want to edit. You can browse or search for users.
-
Click the details icon to expand the user you want to edit, and then click the pencil icon.
-
On the Profile tab, scroll down to the Other section.
-
Find the new User attribute "accessprofile" and assign the VPN profile.
In this example, the VPN profile defined at the Controller is named access-profile.

Validation
Please refer to this doc for more validation details.