Creating an AWS TGW
To use the AWS TGW (Transit Gateway) feature, you must first create an AWS Transit Gateway.
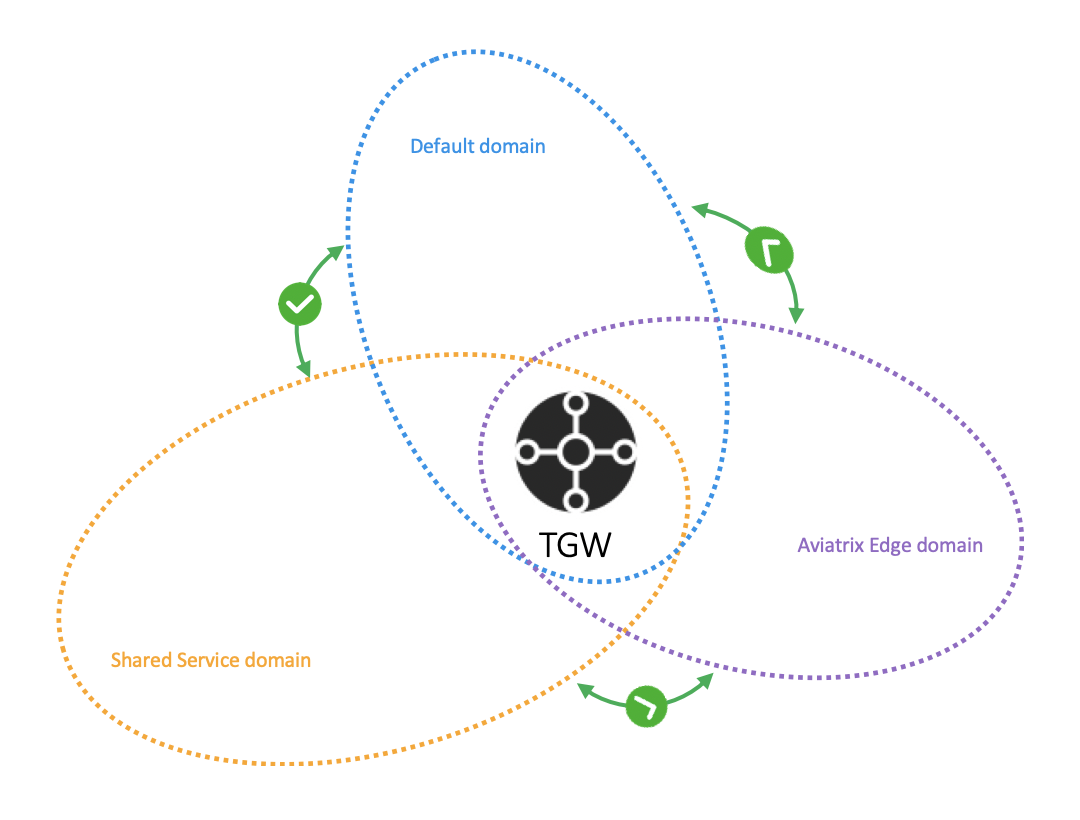
This step creates an AWS Transit Gateway in a specified region with a specified AWS account. Aviatrix CoPilot also automatically creates the Default_Domain, the Shared_Service_Domain and the Aviatrix_Edge_Domain and the corresponding AWS Transit Gateway route tables.
The three domains are connected. If you attach a VPC to the Default Domain or Shared Service Domain, the VPCs can communicate with each other and can access on-prem environments through the Aviatrix Edge Domain.

The three domains are connected, implying that if you attach a VPC to the Default Domain or Shared Service Domain, the VPCs can communicate with each other and can access on-prem through the Aviatrix Edge Domain.
To create an AWS Transit Gateway:
-
Go to Aviatrix CoPilot > Networking > Connectivity > select the AWS TGW tab.
-
Click + AWS TGW.
| Setting | Value |
|---|---|
Account Name |
An Aviatrix account that corresponds to an IAM role or account in AWS. |
Region |
One of the AWS regions. |
TGW Name |
The name of the AWS Transit Gateway. |
AWS Side AS Number |
TGW ASN number. The default AS number is 64512. |
Advanced Settings |
|
FireNet Inspection Mode |
Select either mode:
|
TGW CIDR(s) |
Enter the TGW CIDR ranges. |
Click Save.
The AWS TGW is created. You can monitor its progress by going to Monitor > Notifications > select the Tasks tab and reviewing the status of the gateway creation.